Fabrication: Humanoid Puppet
Over the months of my DYCP, my mentors Elizabeth Johnson (Elizabeth Johnson Makes) and Cat Rock (House of Funny Noises), plus both folk at Puppet Place and in the wider puppetry community, kindly shared their insights and experience of fabricating puppets.
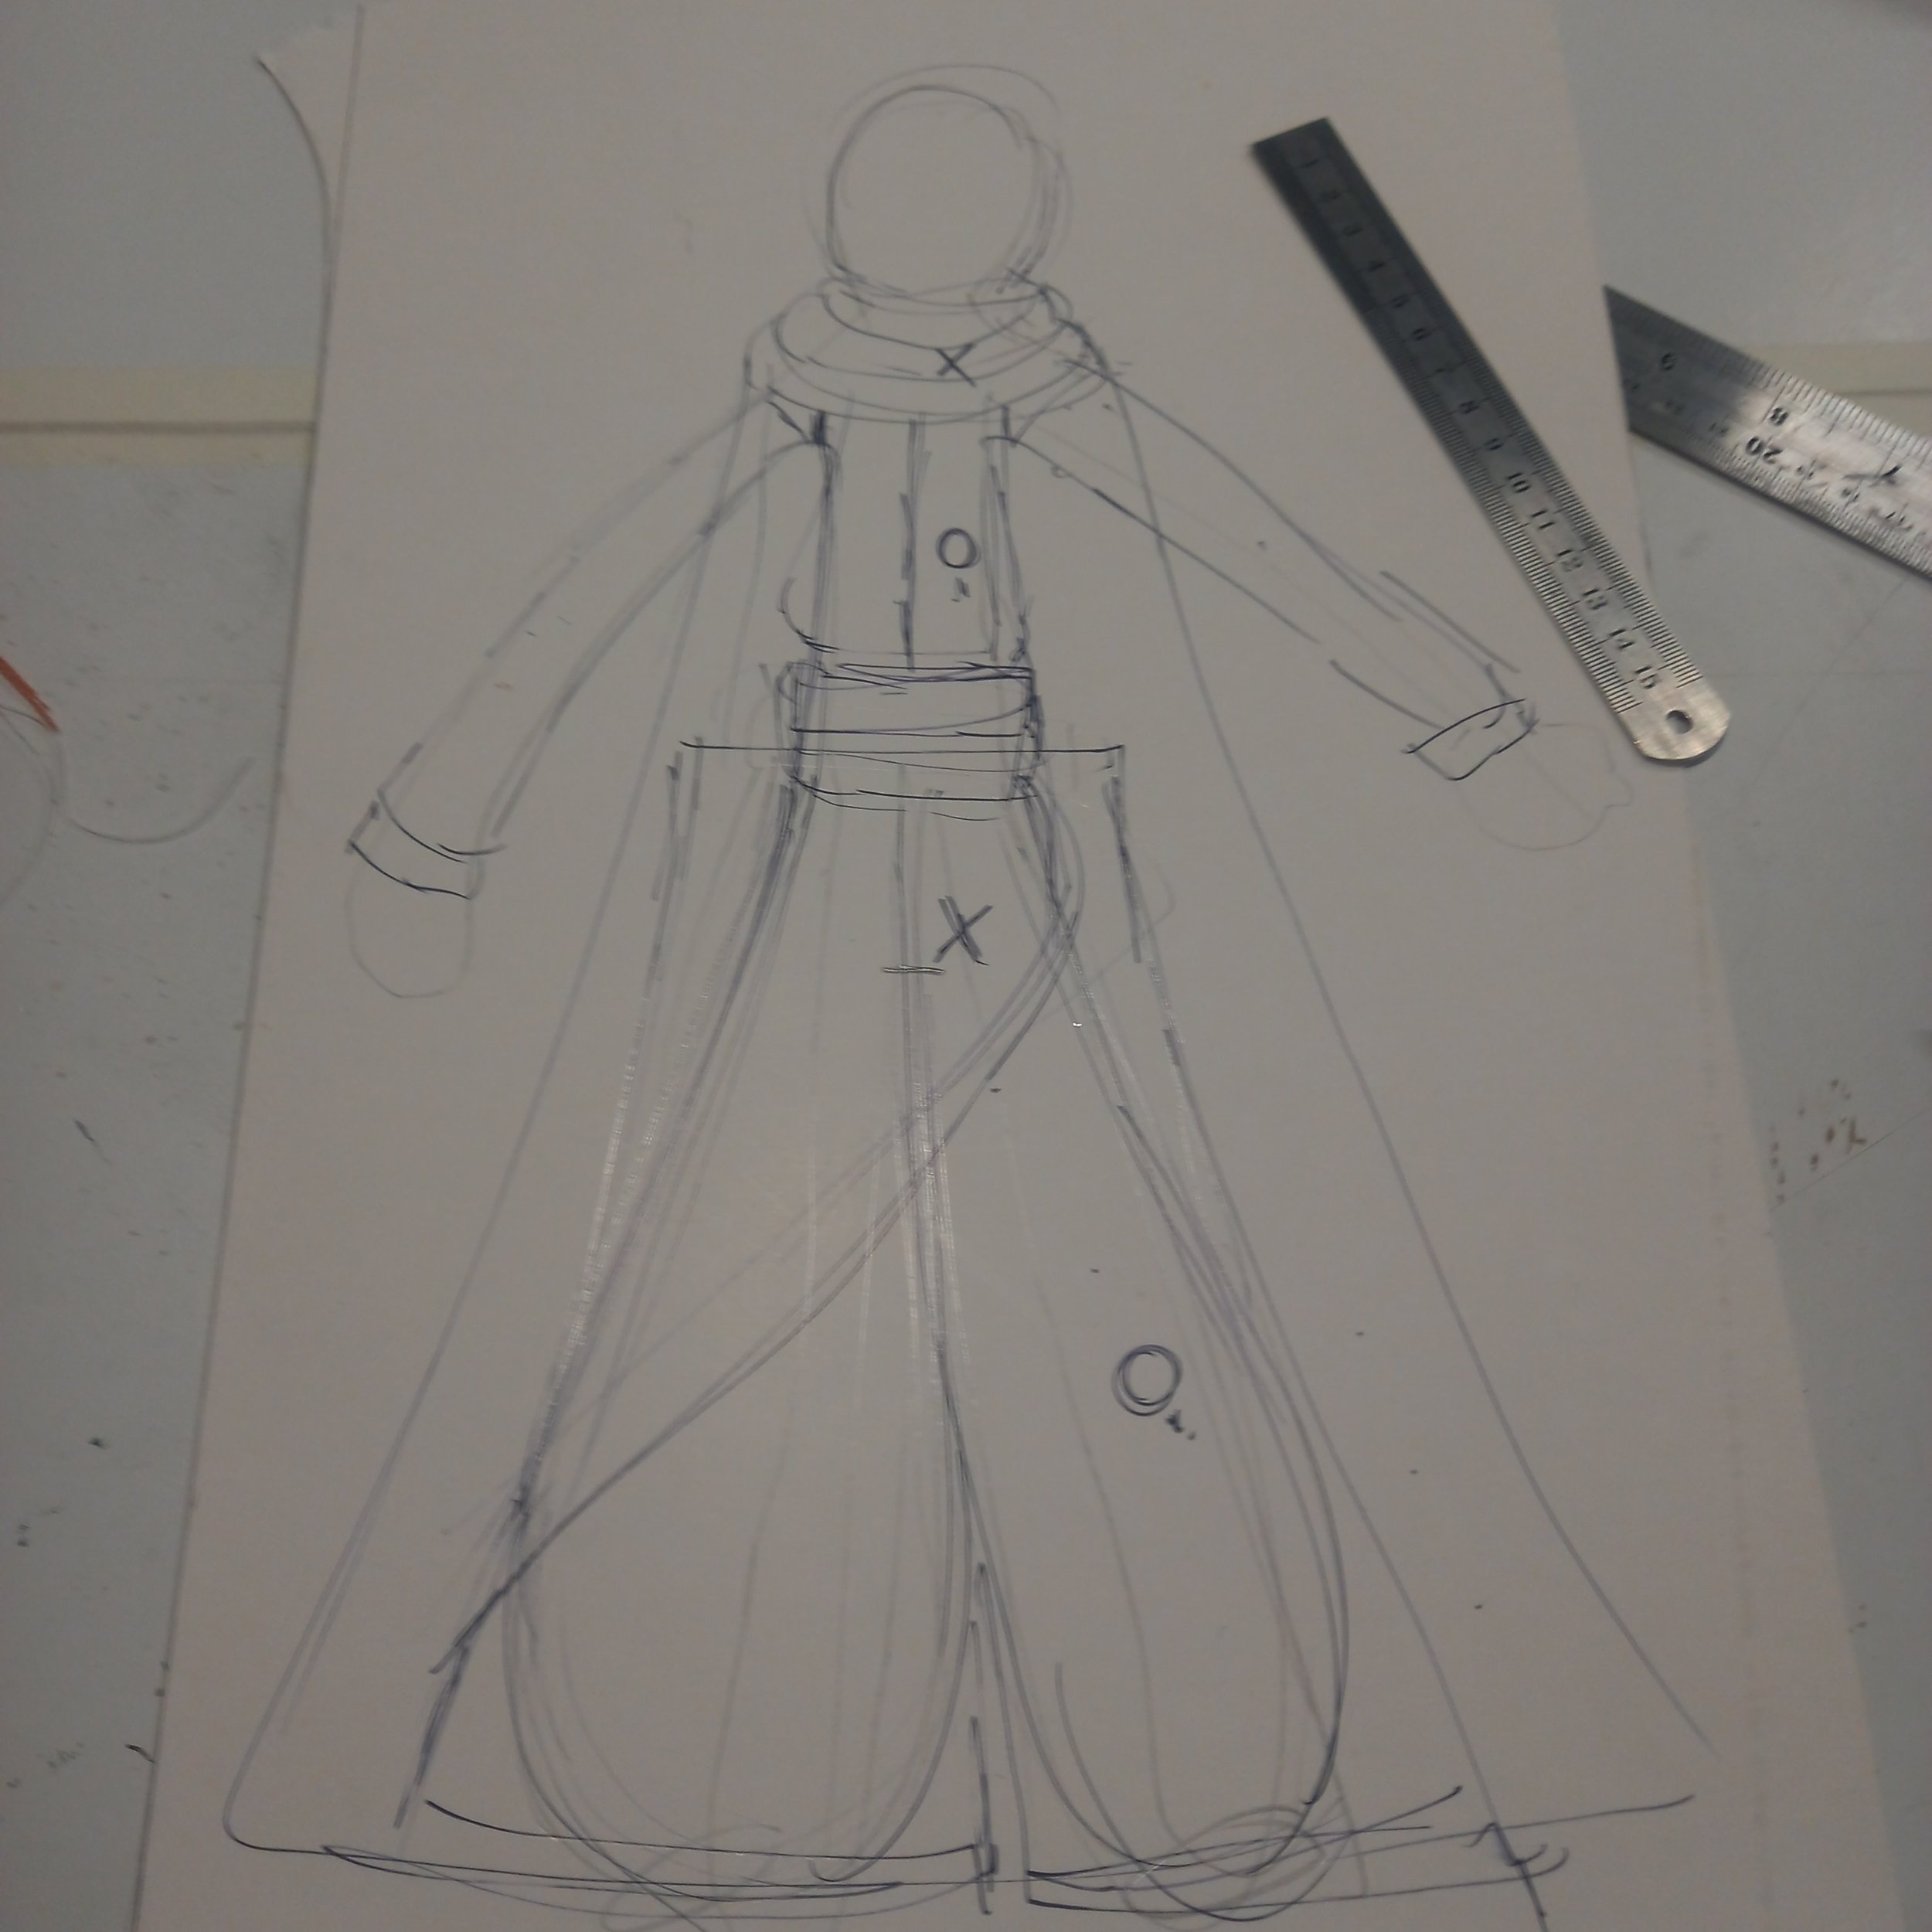
As previously mentioned (see Fabrication: First Steps), having settled on making a humanoid, an animal, and a plant puppet, Lizzie and I designed and sketched out the basis of the humanoid and animal, working out their comparative sizes, body shapes, joints and articulation, and - because we planned to use rods for the puppeteering - where the points of attachment would be.
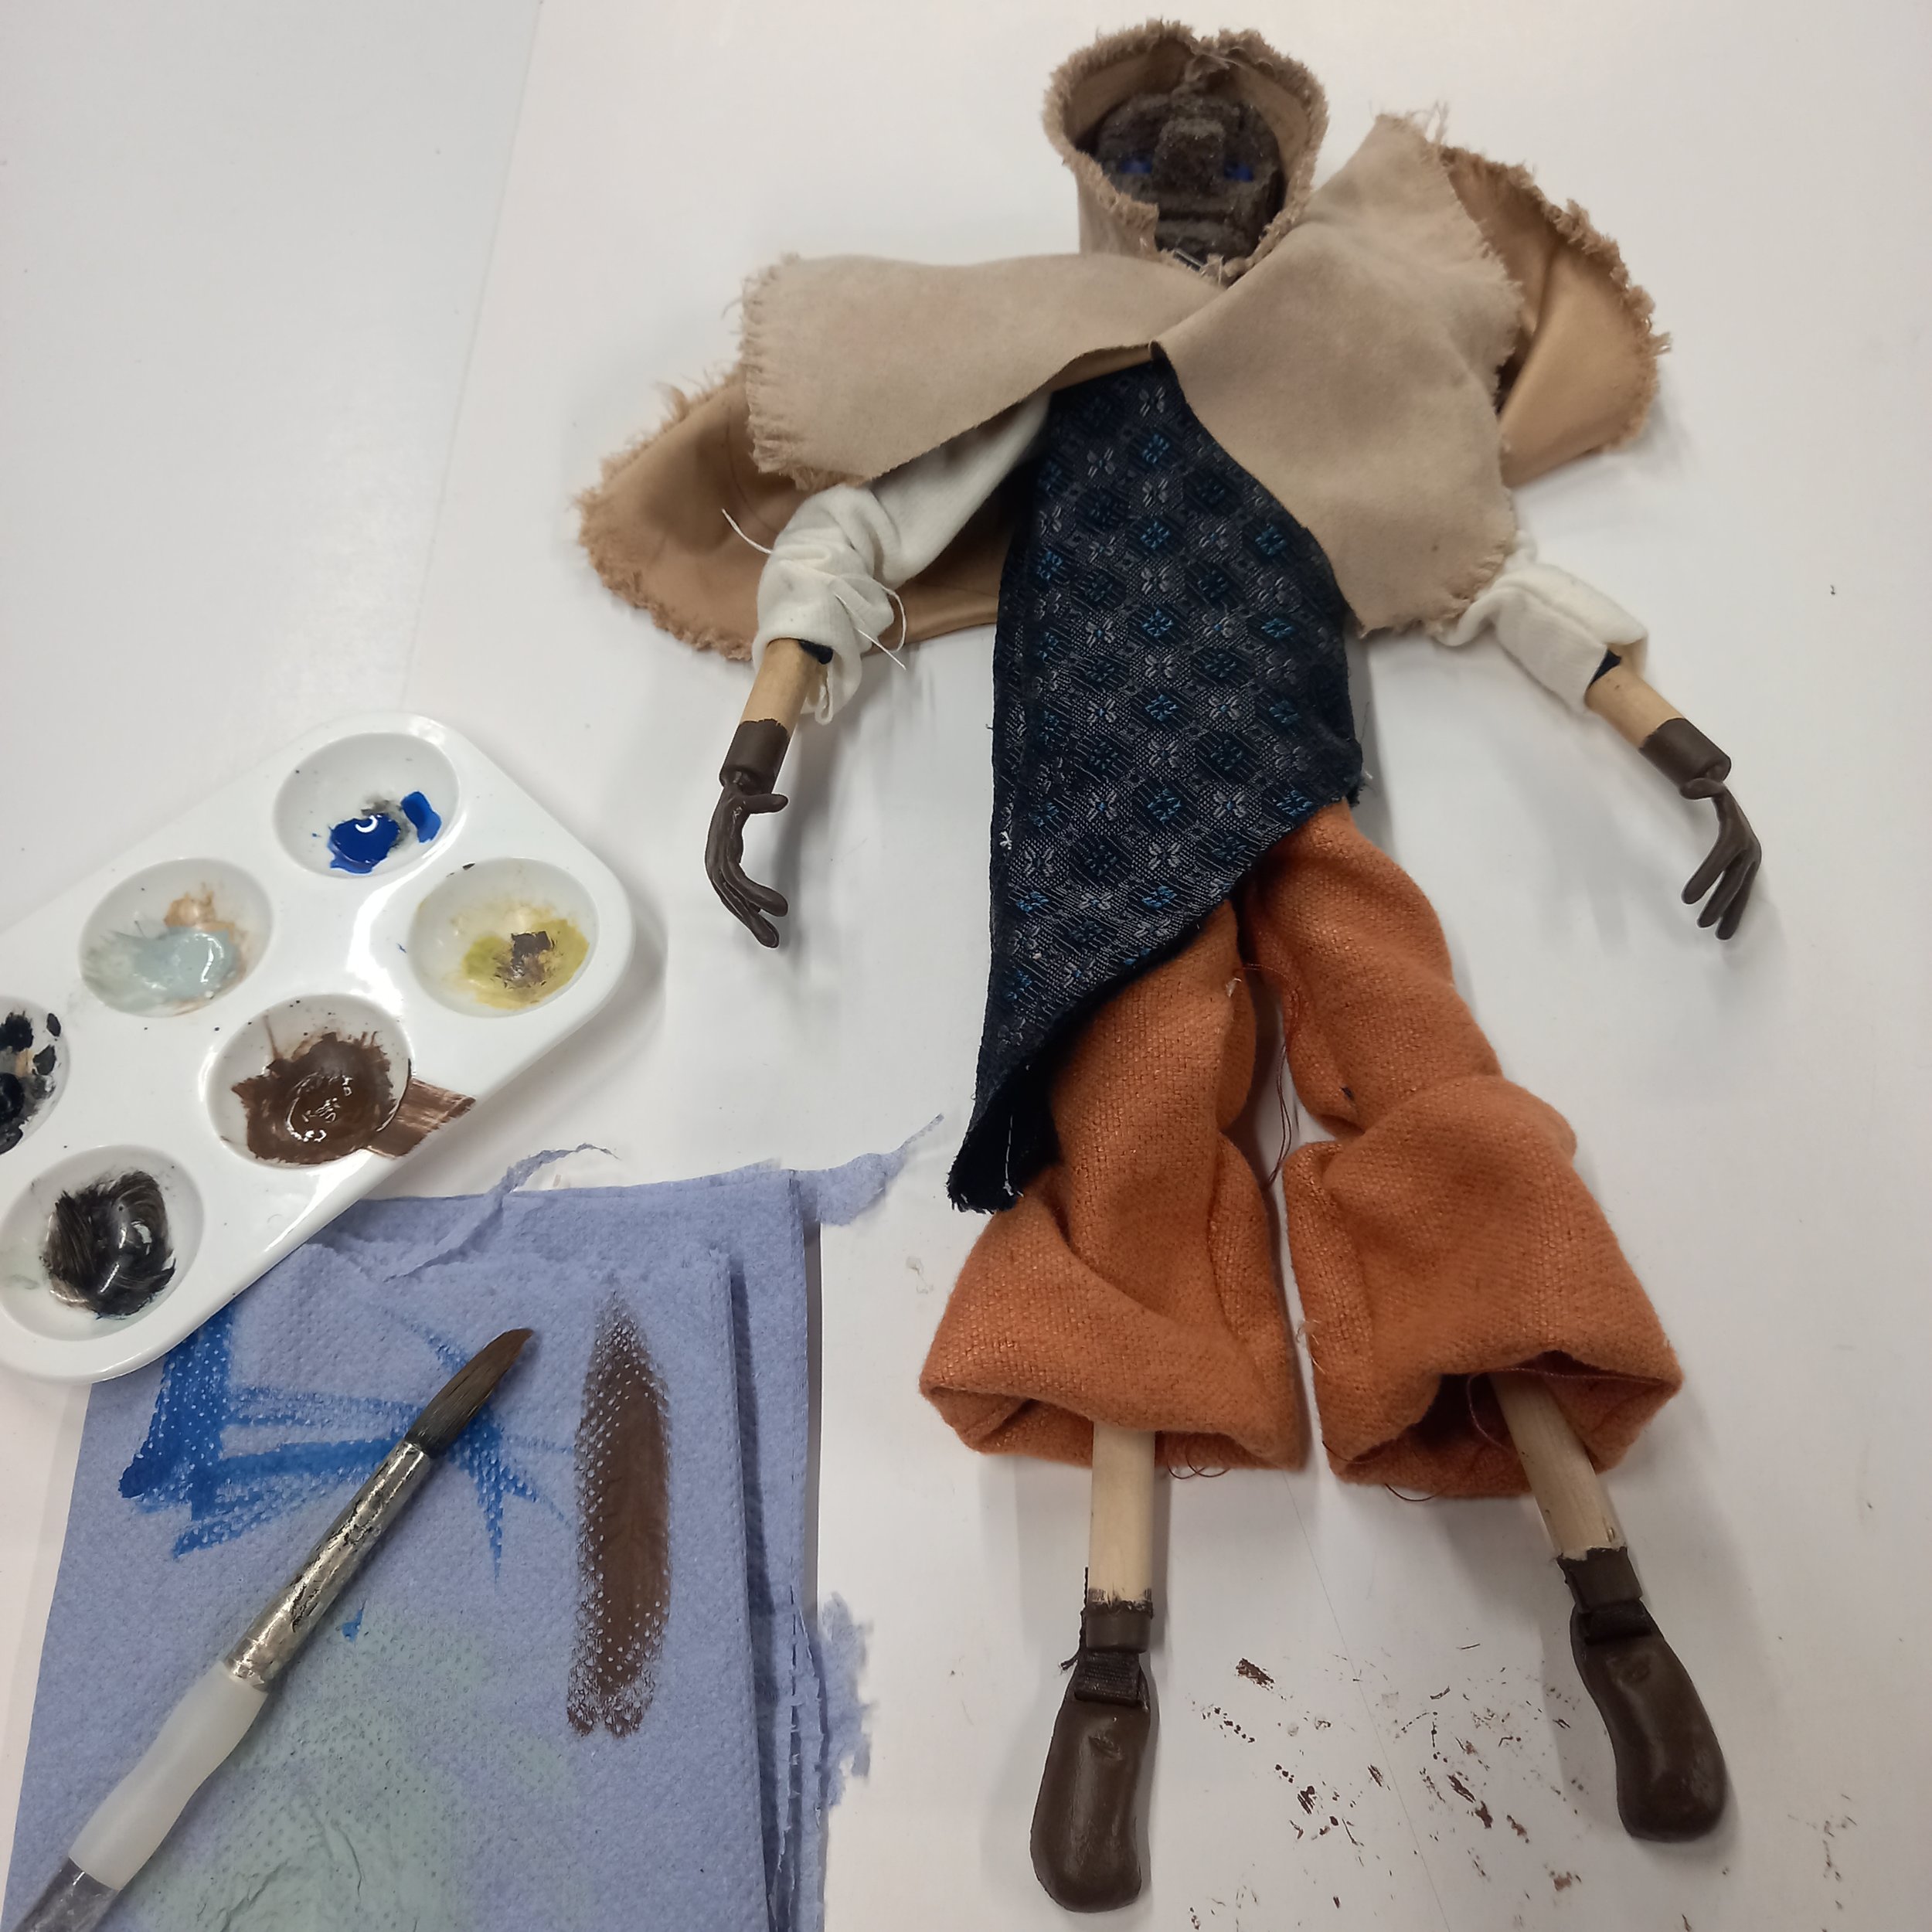
For the humanoid puppet, we settled on a tried-and-tested webbing and block body with wooden dowel limbs. But now we needed a head, hands, and feet, points of attachment for the rods, and clothes…
Faces and heads, both our alien humanoid and robot cat, were without doubt the most difficult aspect of fabrication for me. I spent a lot of time practicing, shaping and sculpting plasticine or carefully carving foam of varying densities with a scalpel, before I started to get the hang of what Lizzie was patiently teaching me. Thankfully, Lizzie lent me Facial Expressions: A Visual Reference for Artists, by Mark Simon, which helped me get a feel for different facial shapes and expressions.
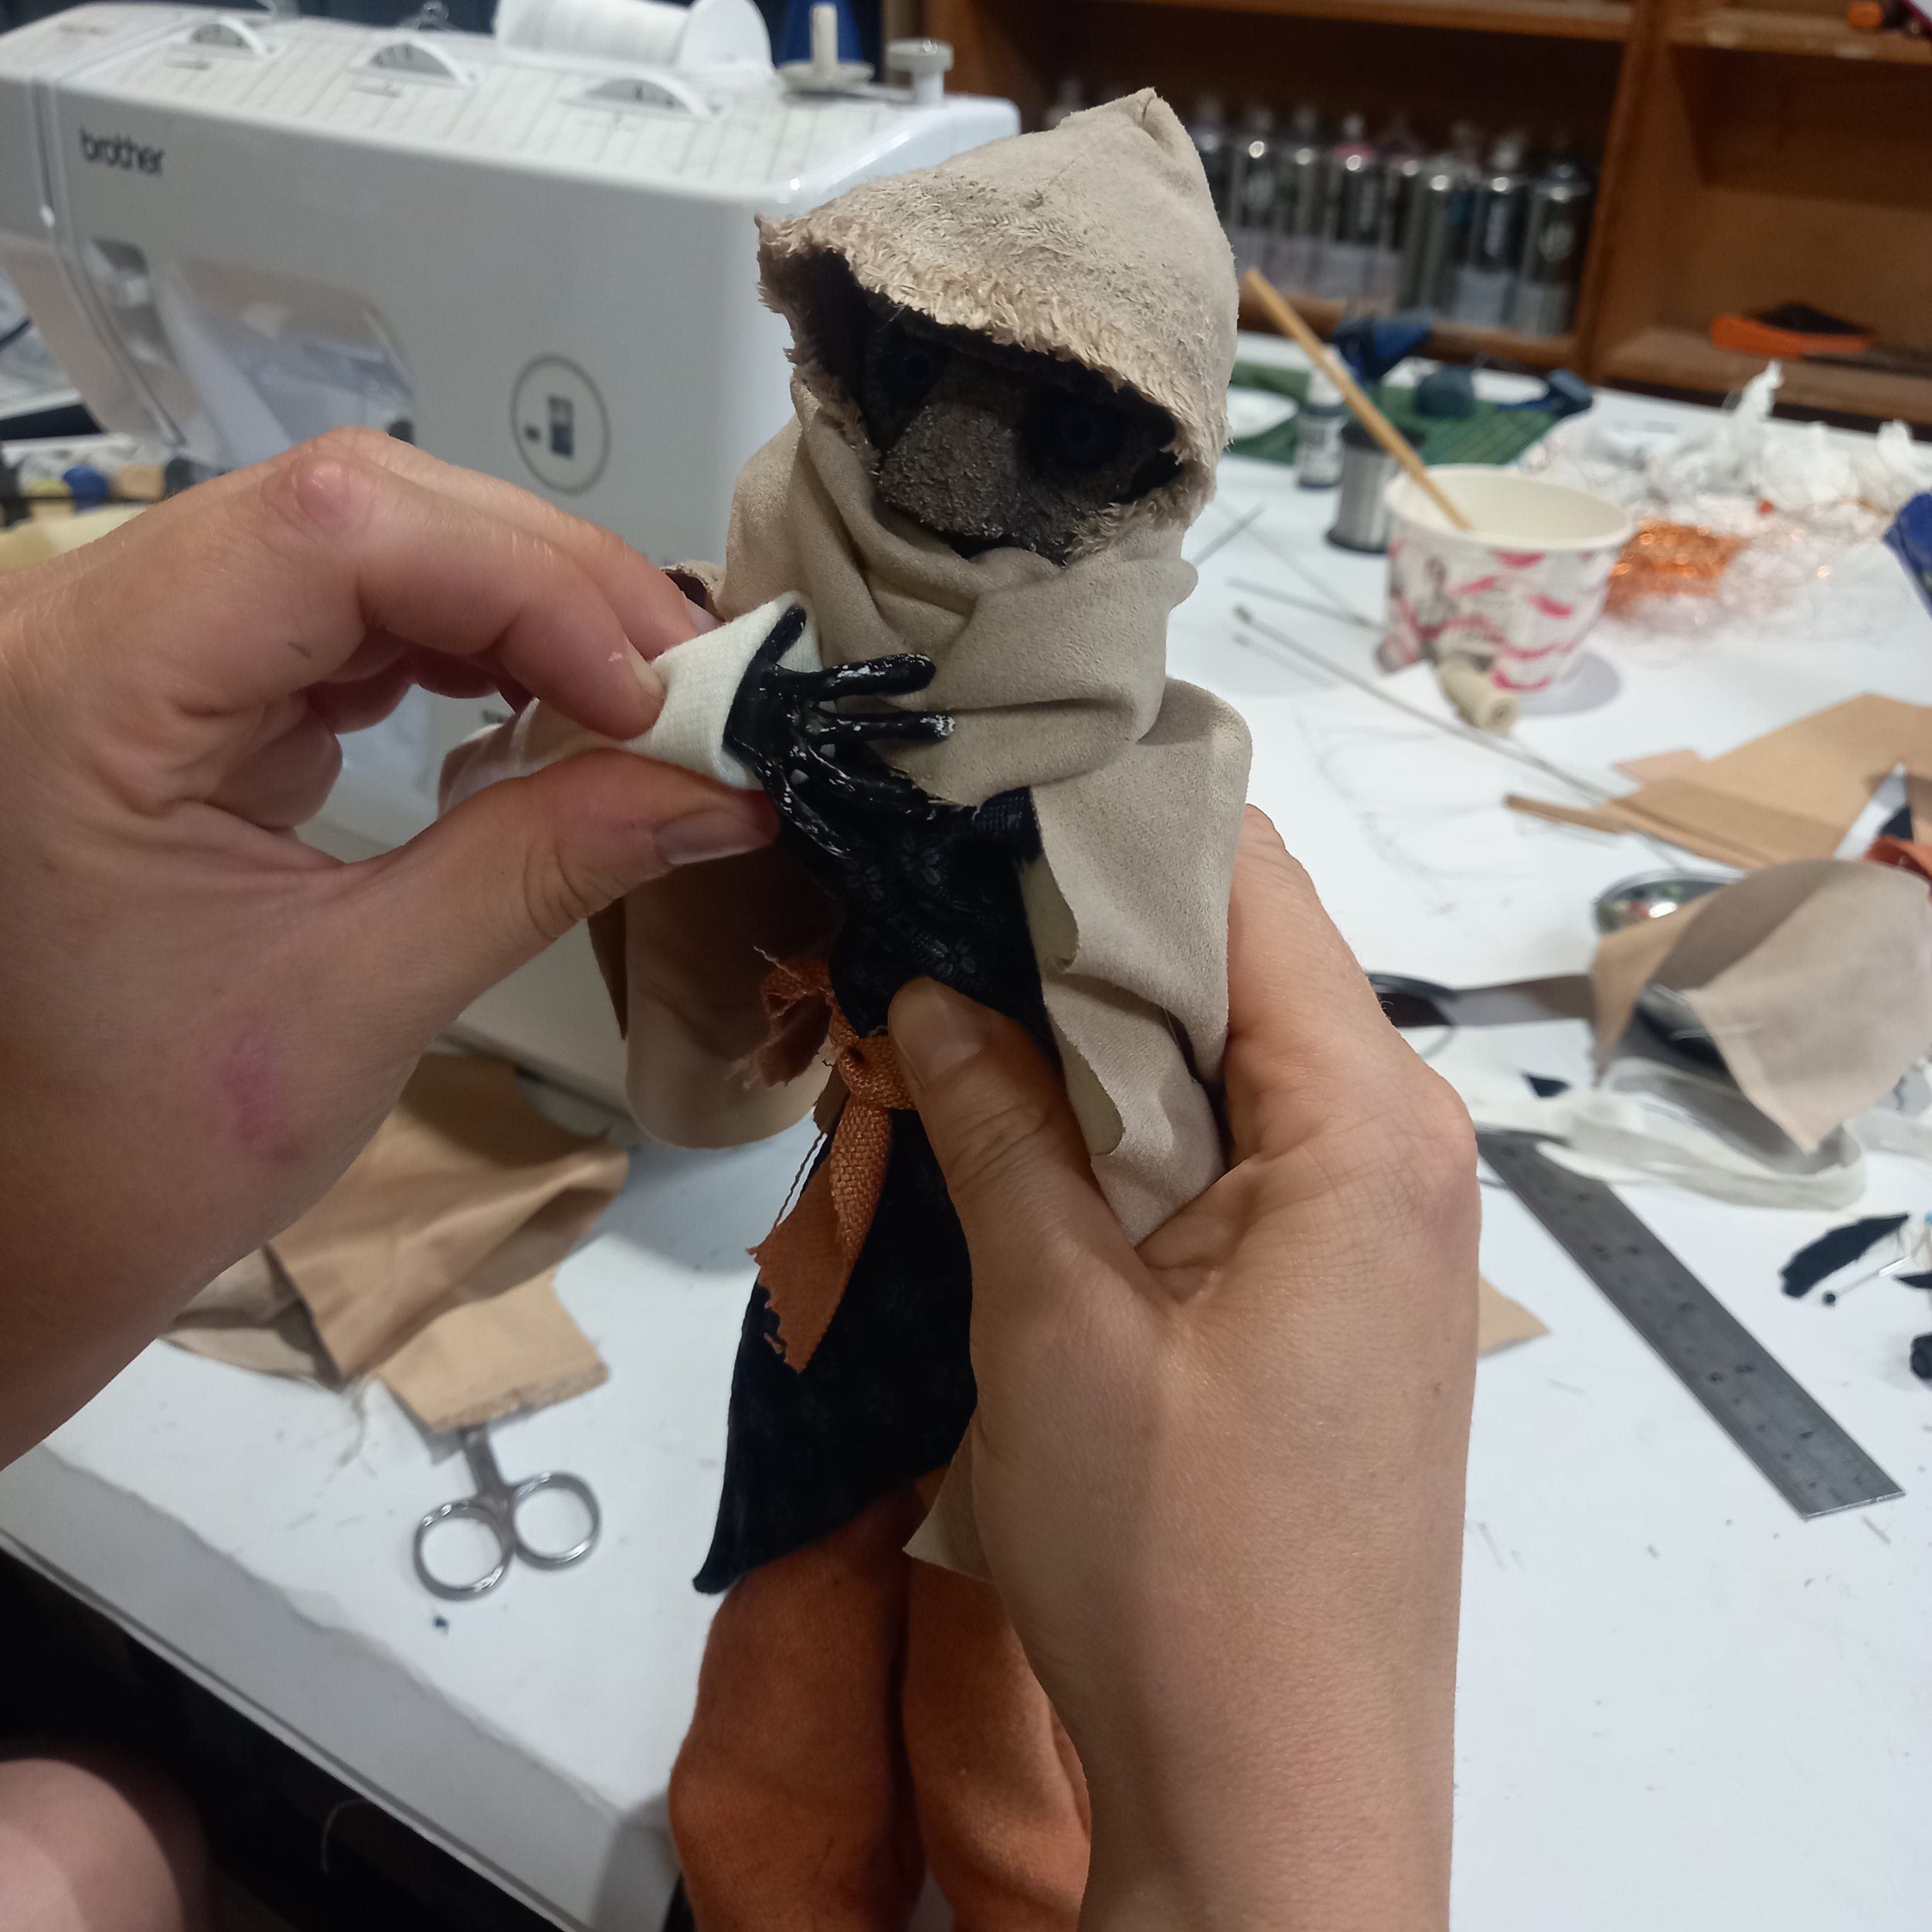
Out of all the options available, such as Sculpey over a tinfoil base or making a resin mould and casting the head, I settled on carving it from foam. All of the methods had their pros and cons, would keep the head light, but in the end, I liked the process of sculpting the foam, the feel of carving the face from a single block. I was after a non-human look, like parched-earth and cracked rock, and the cut foam with a layer of white pumice gave the impression of scars and chips, and being weather worn by the desert.
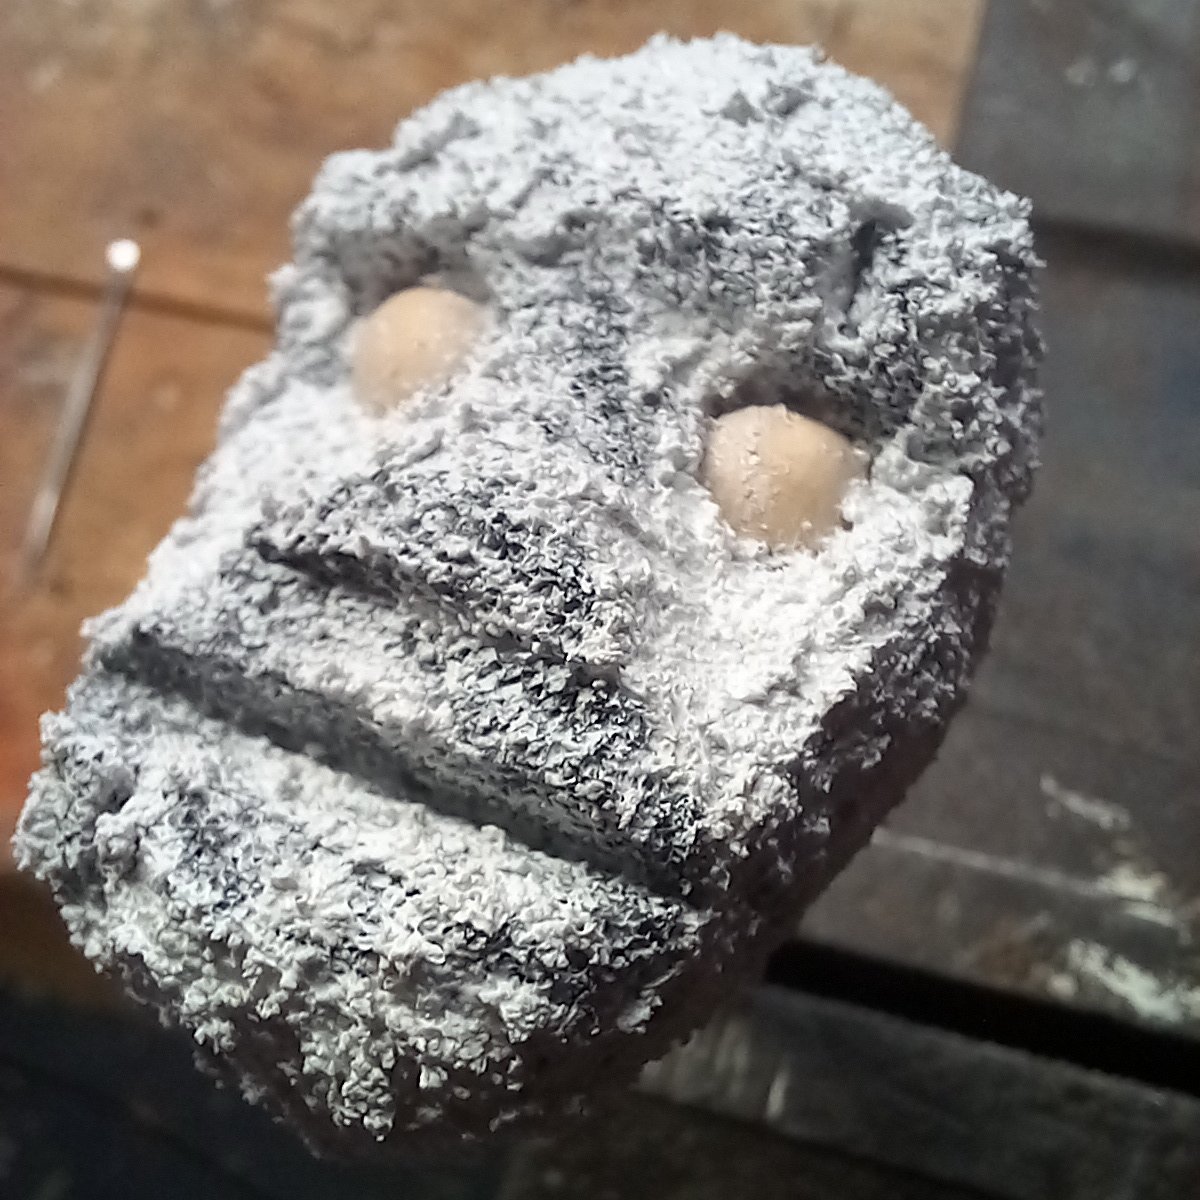
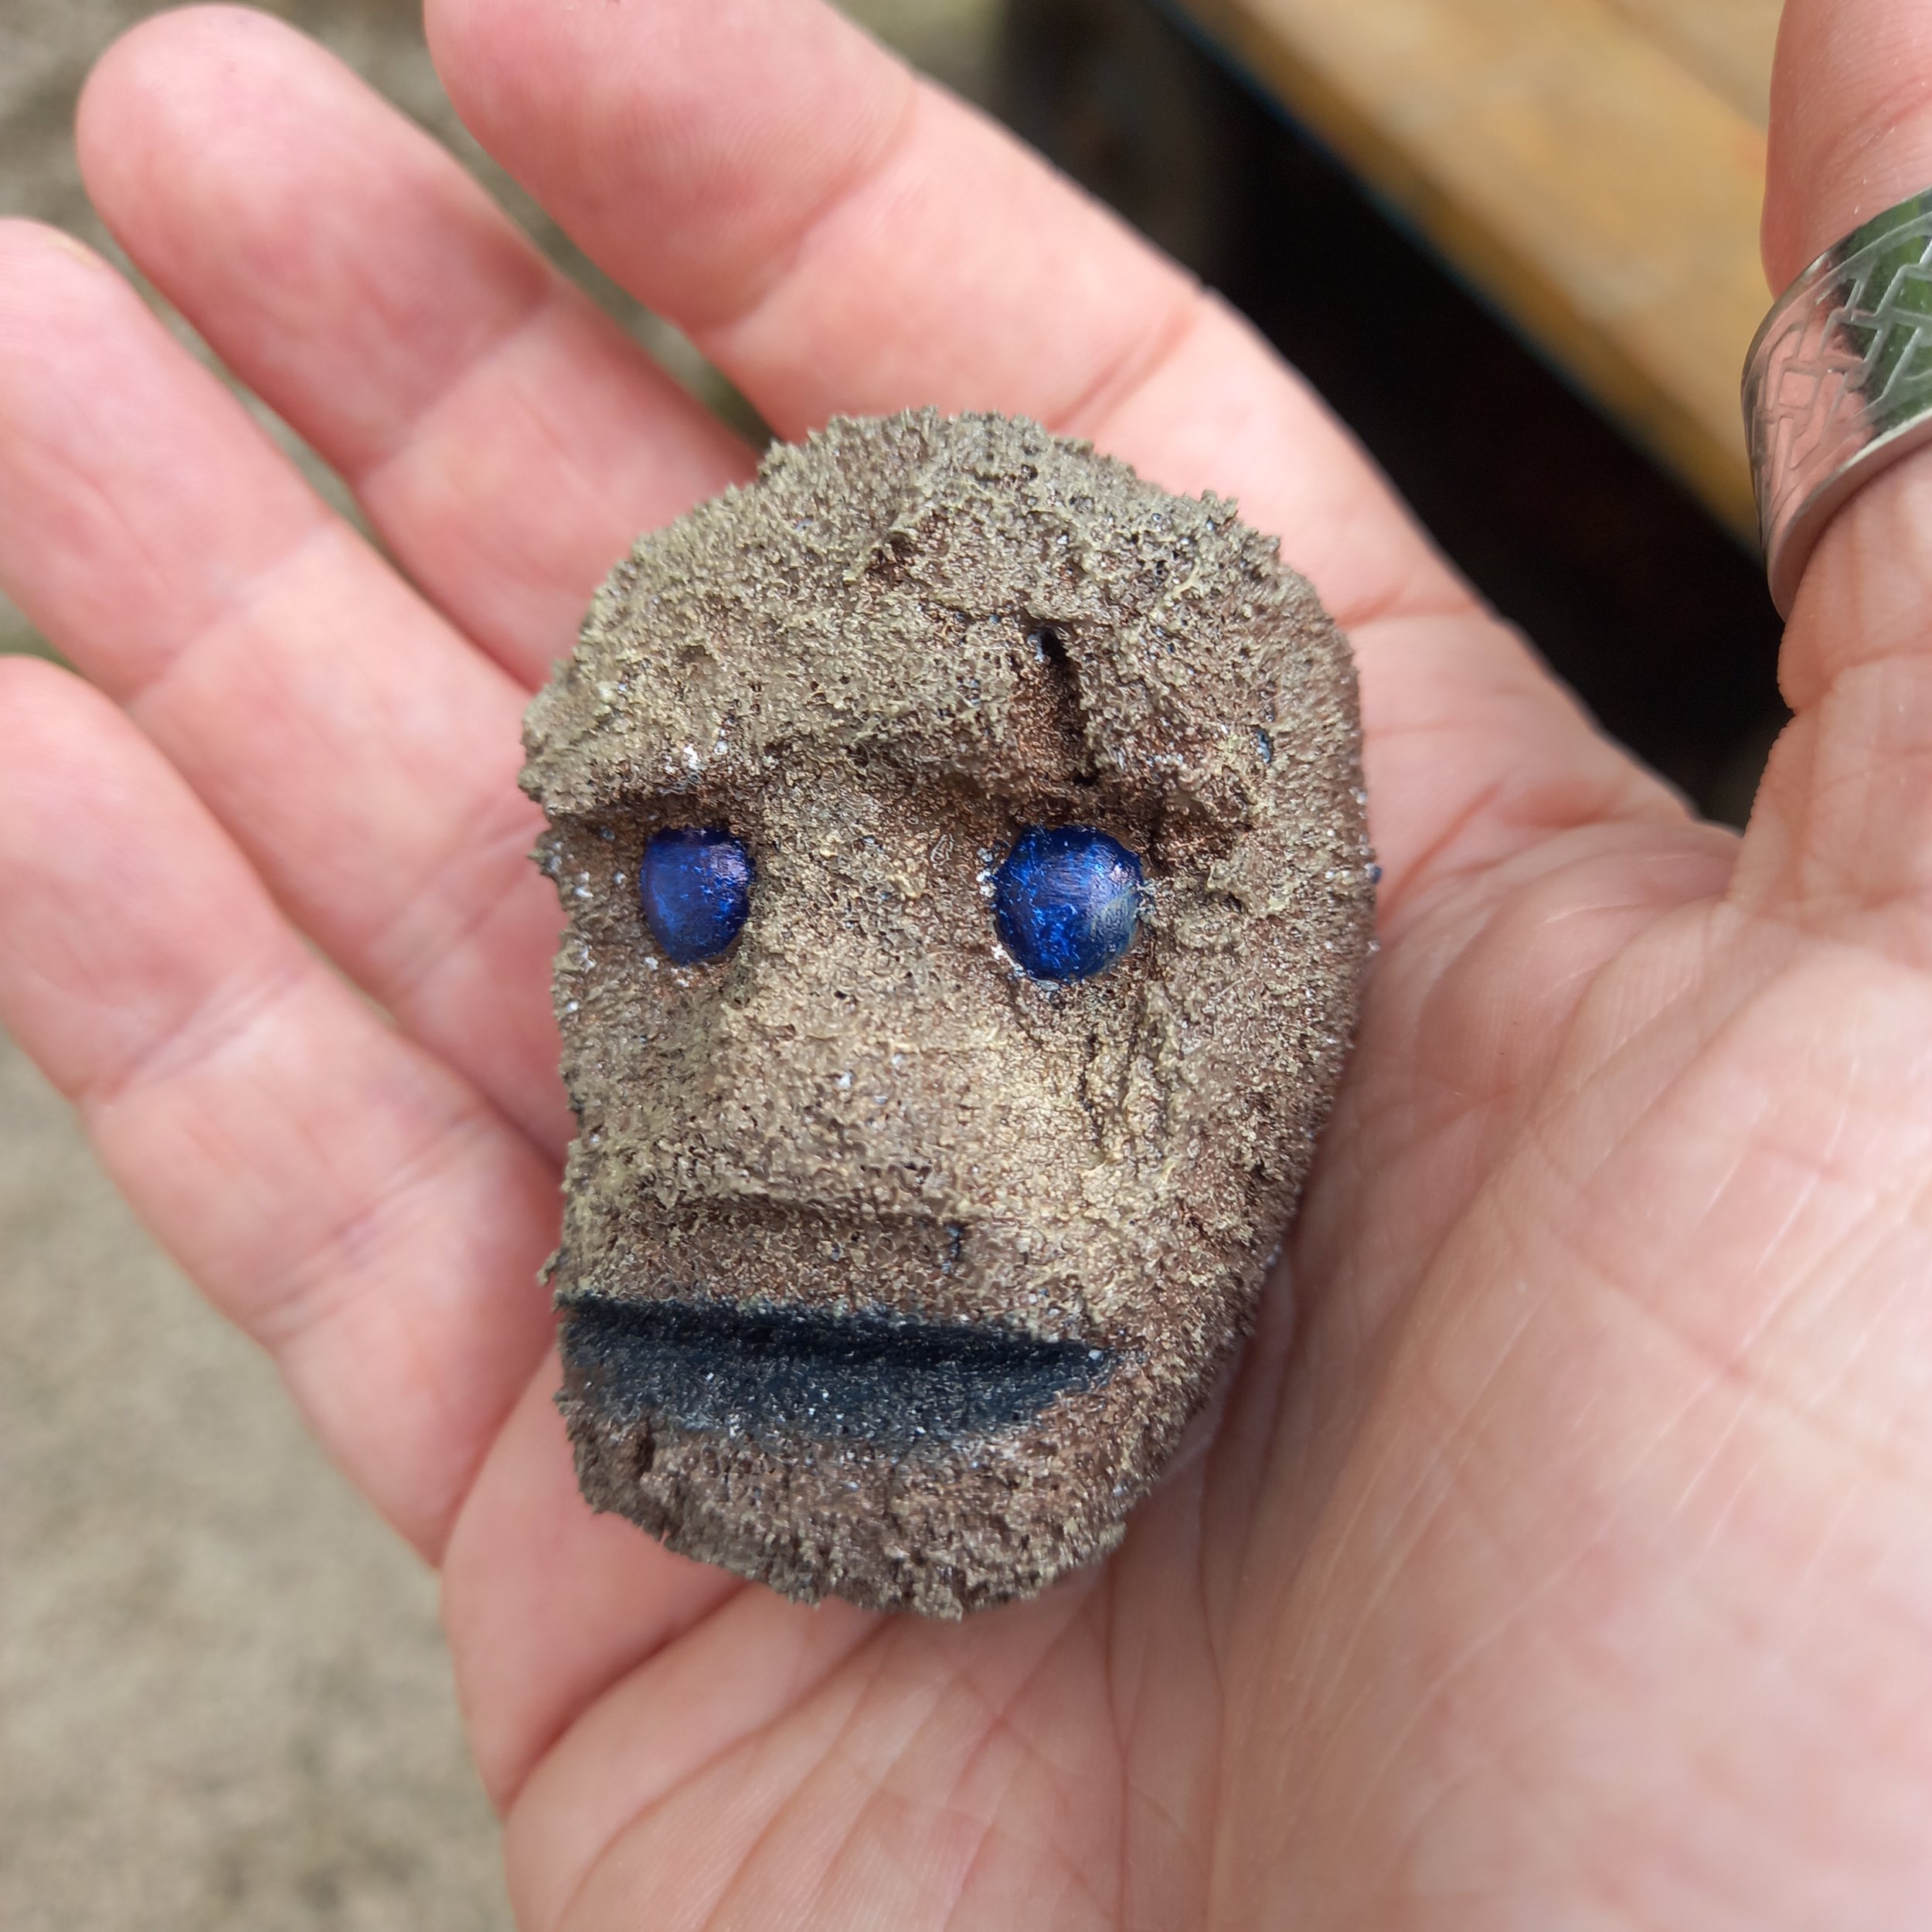
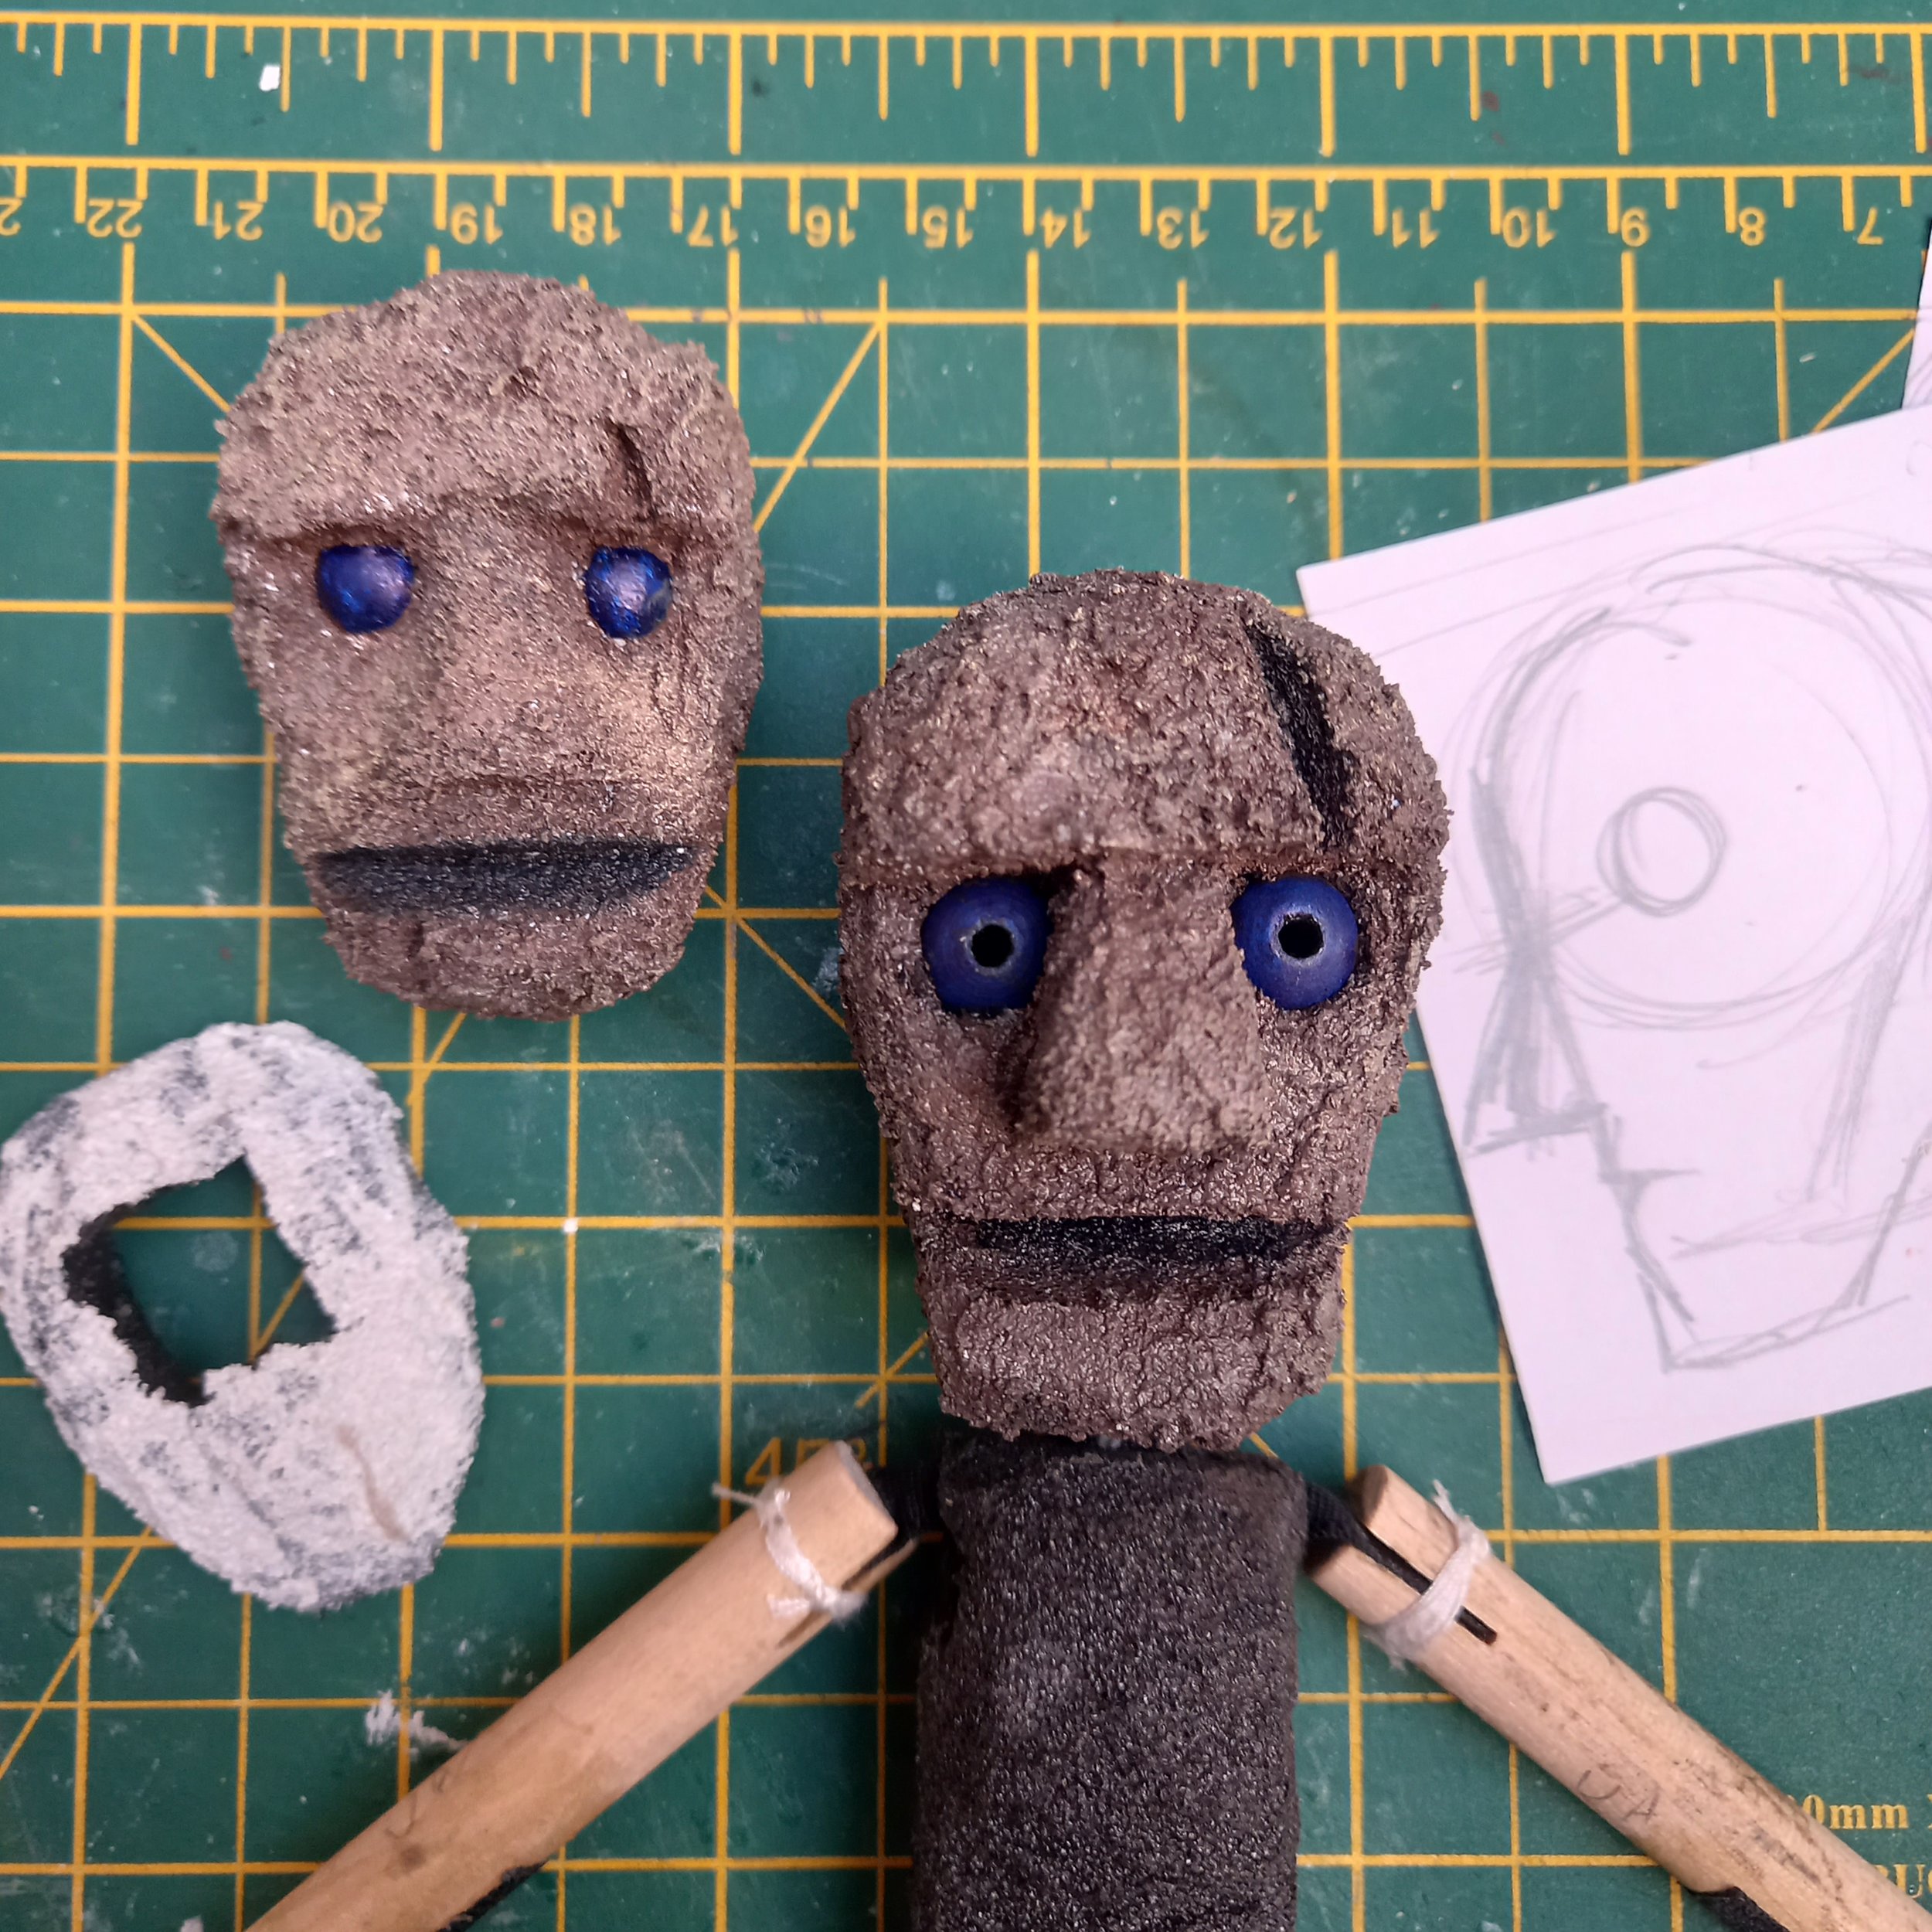
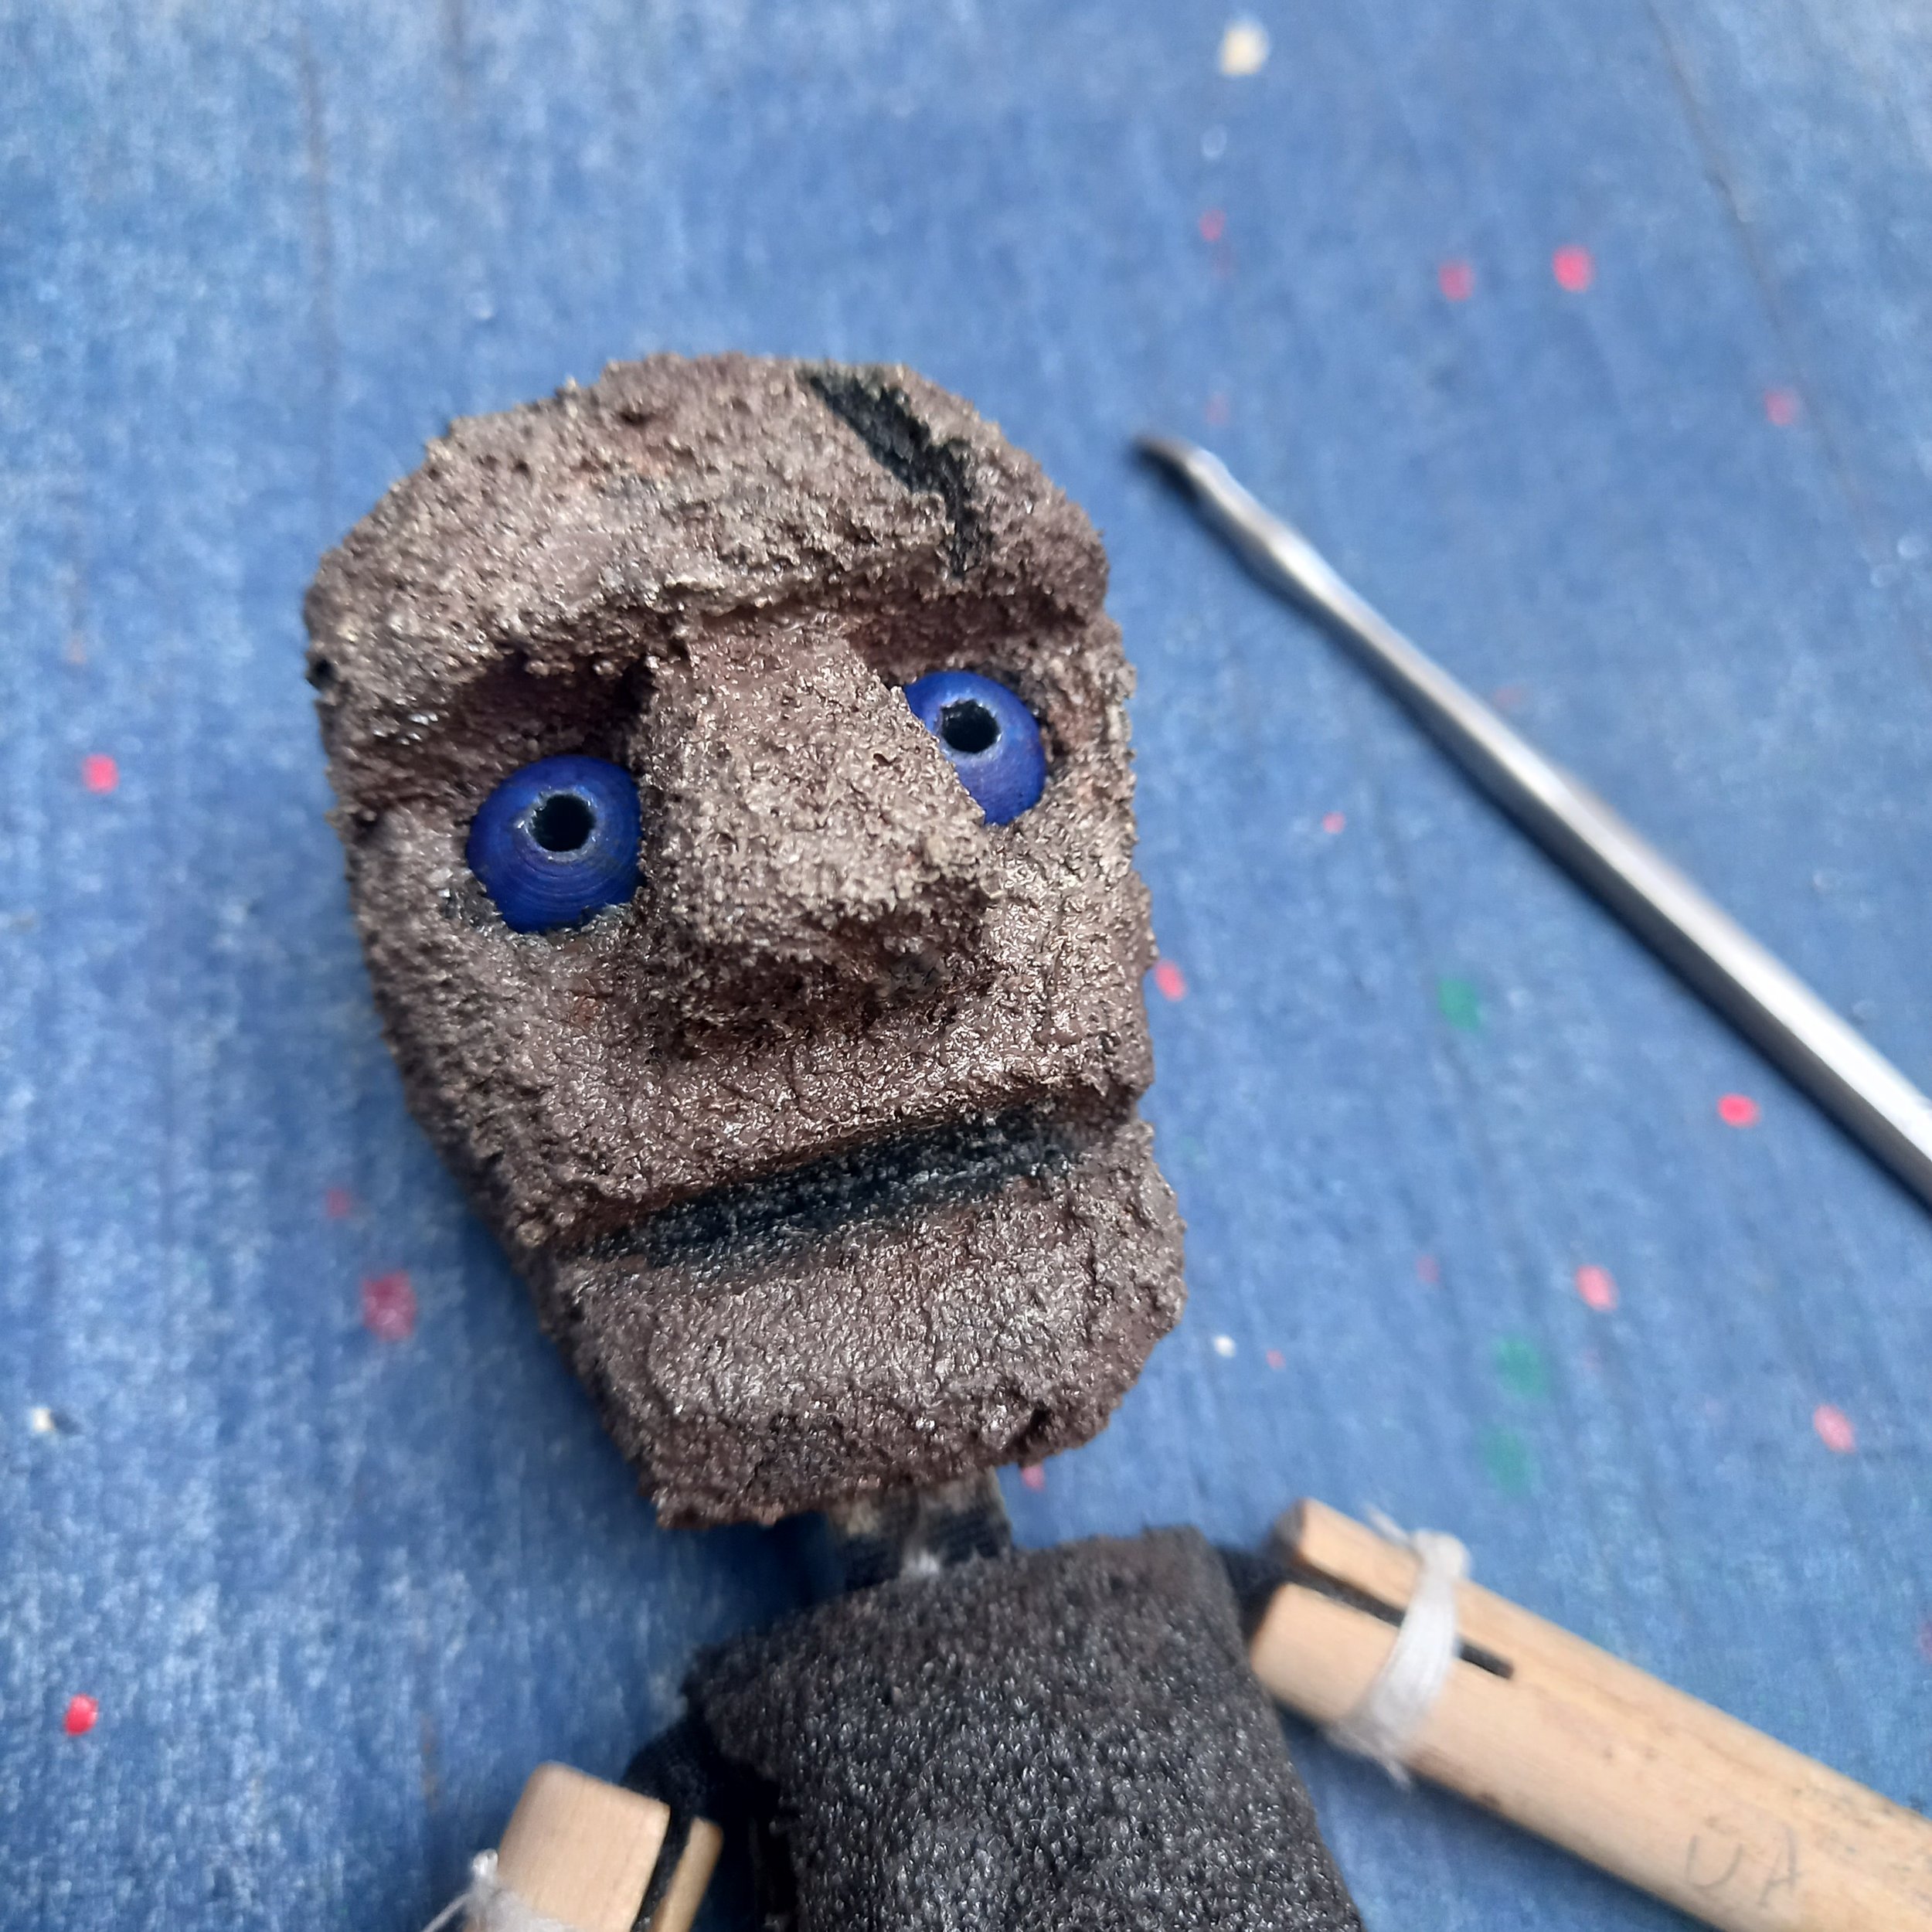
After many attempts, I eventually carved a face that I liked and advanced to the stage of doing test painting, but there was one tiny problem… They didn’t really have a nose! Feedback from my mentors and from folk at Puppet Place cemented the importance of this missing detail; given the size of this tabletop puppet, and the intention for them to wear a hood, the absence of a nose made them somewhat lacking in focus. With the nose, as well as the eyes, being a great tool to signpost where a puppet is directing its attention - the lack of proper beak, coupled with the way I had done the eyes, made them unfocused and therefore much harder to convey intent. Armed with this insight, I went back to the scalpel and cutting mat and carved a much more pronounced set of features and took a different approach with the eyes. Not perhaps, as cute as the other head, but far more readable in its performance.

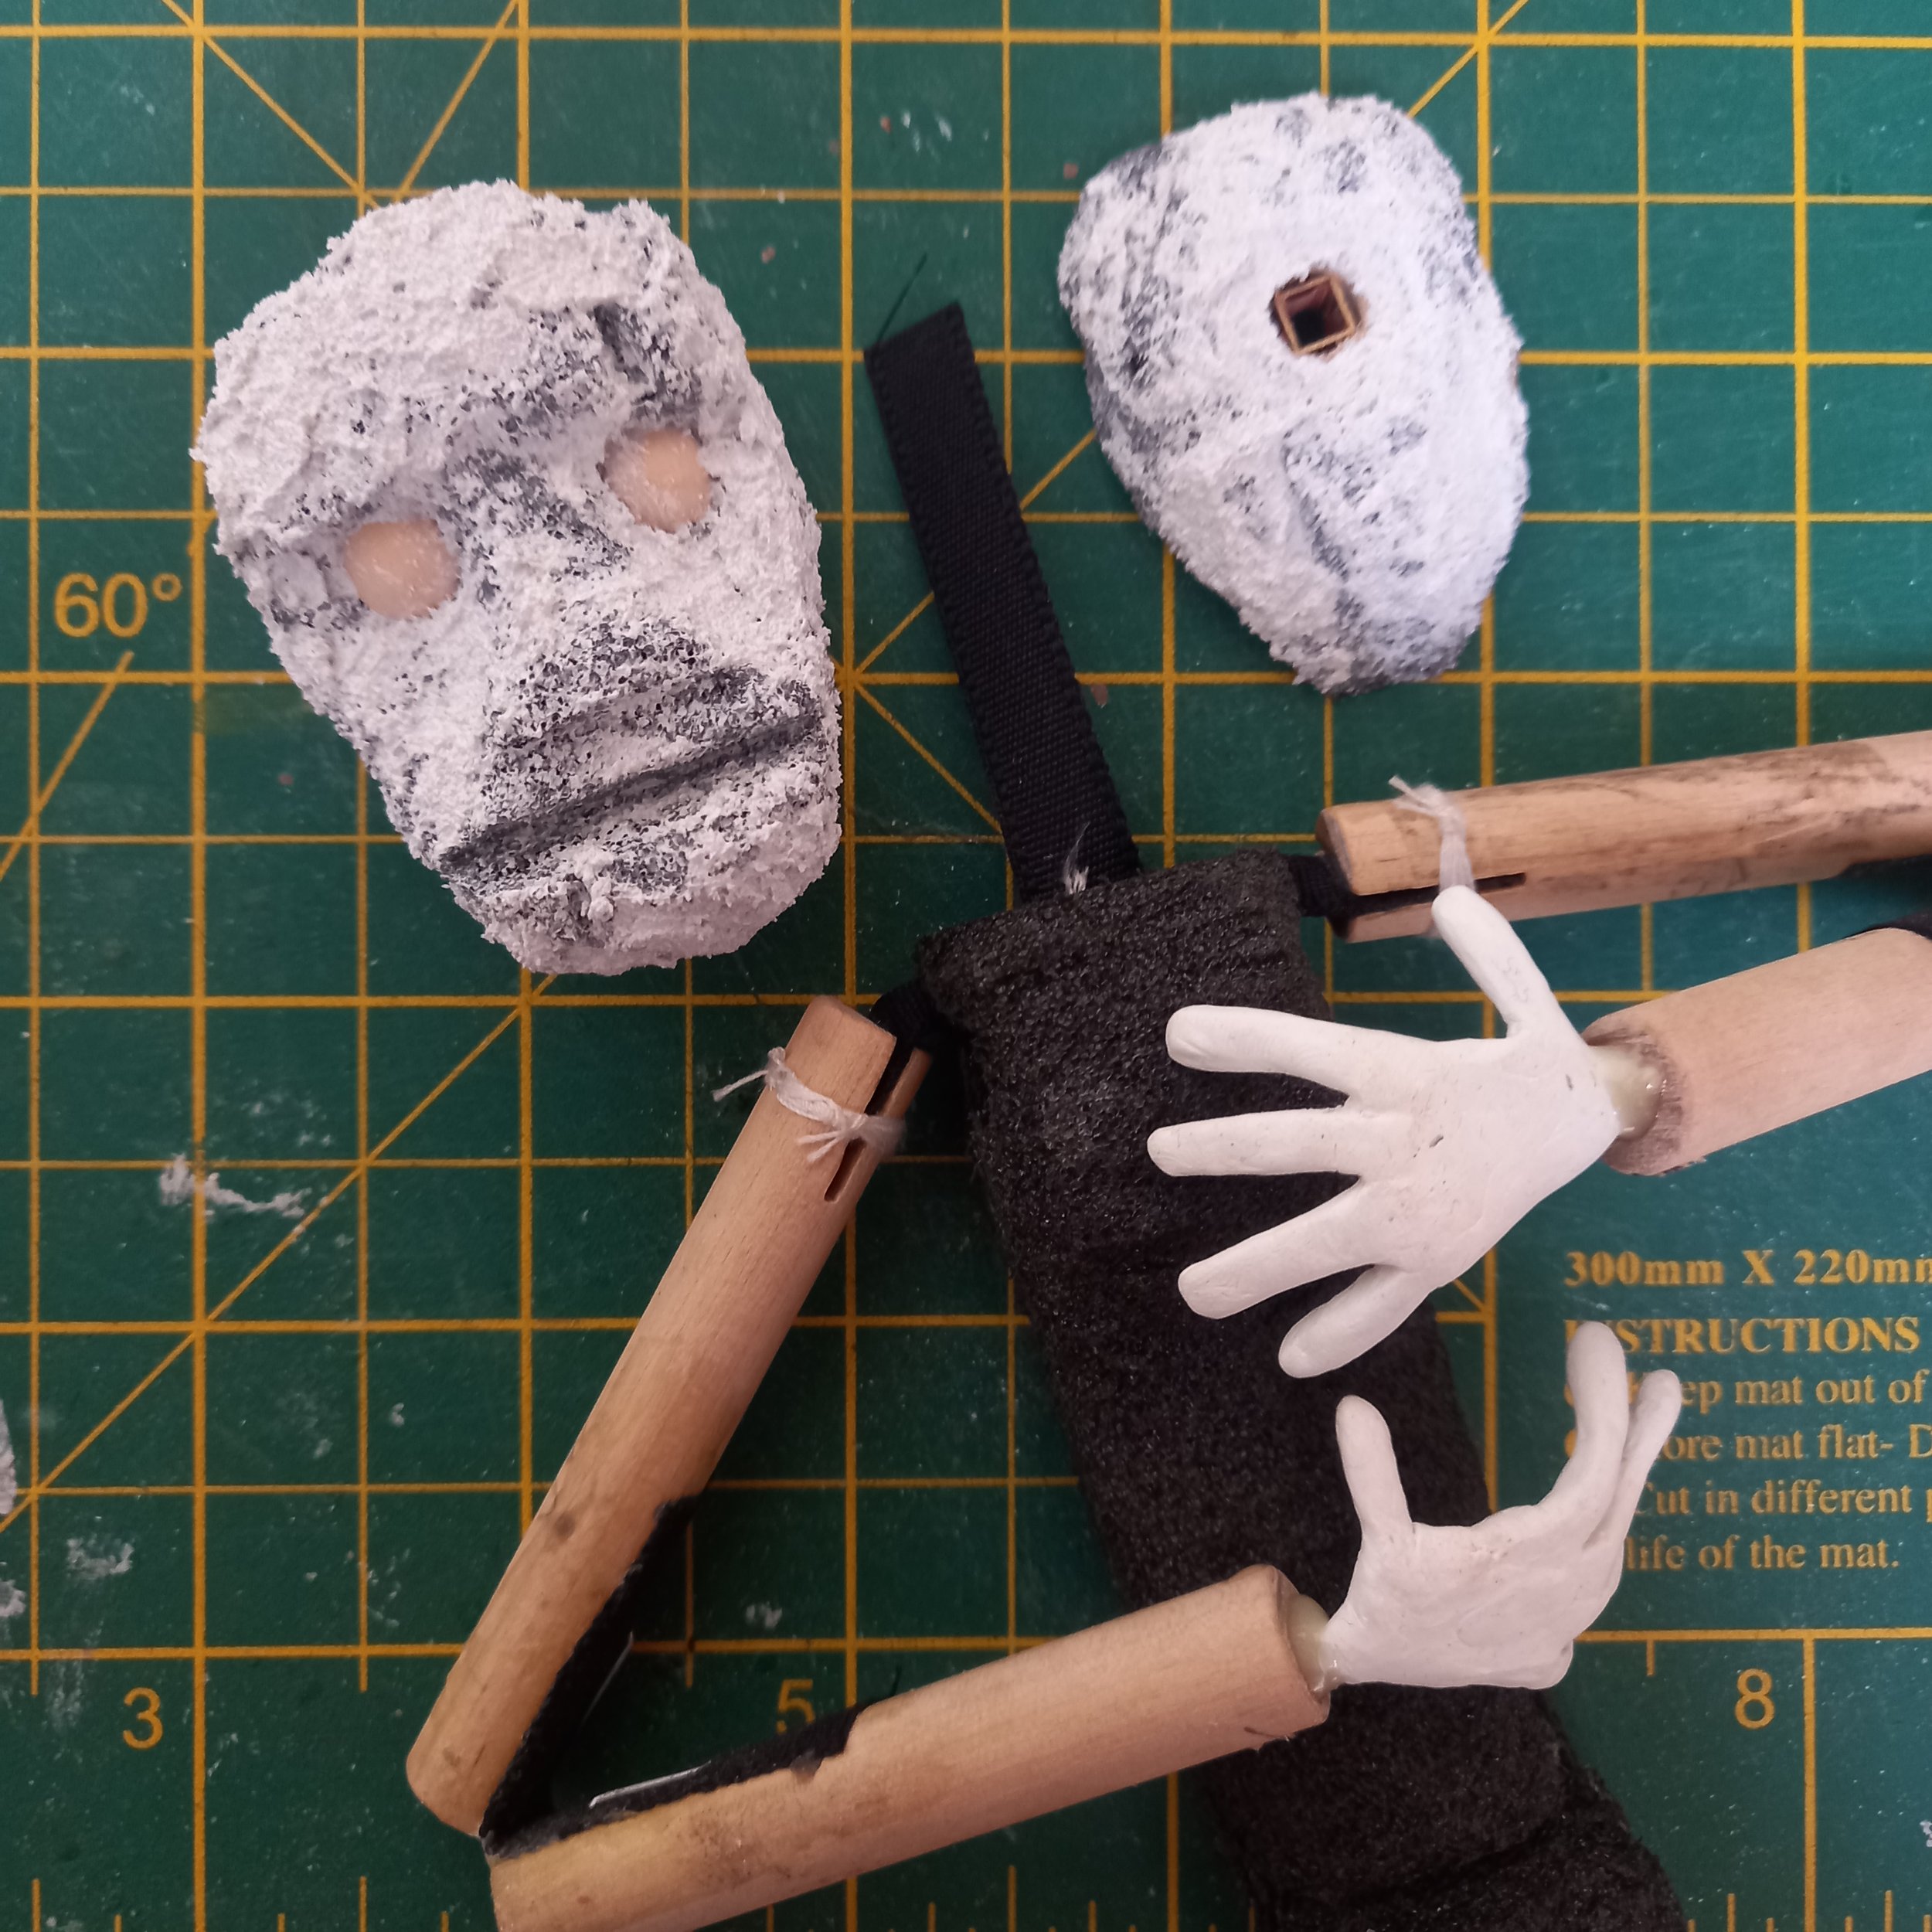
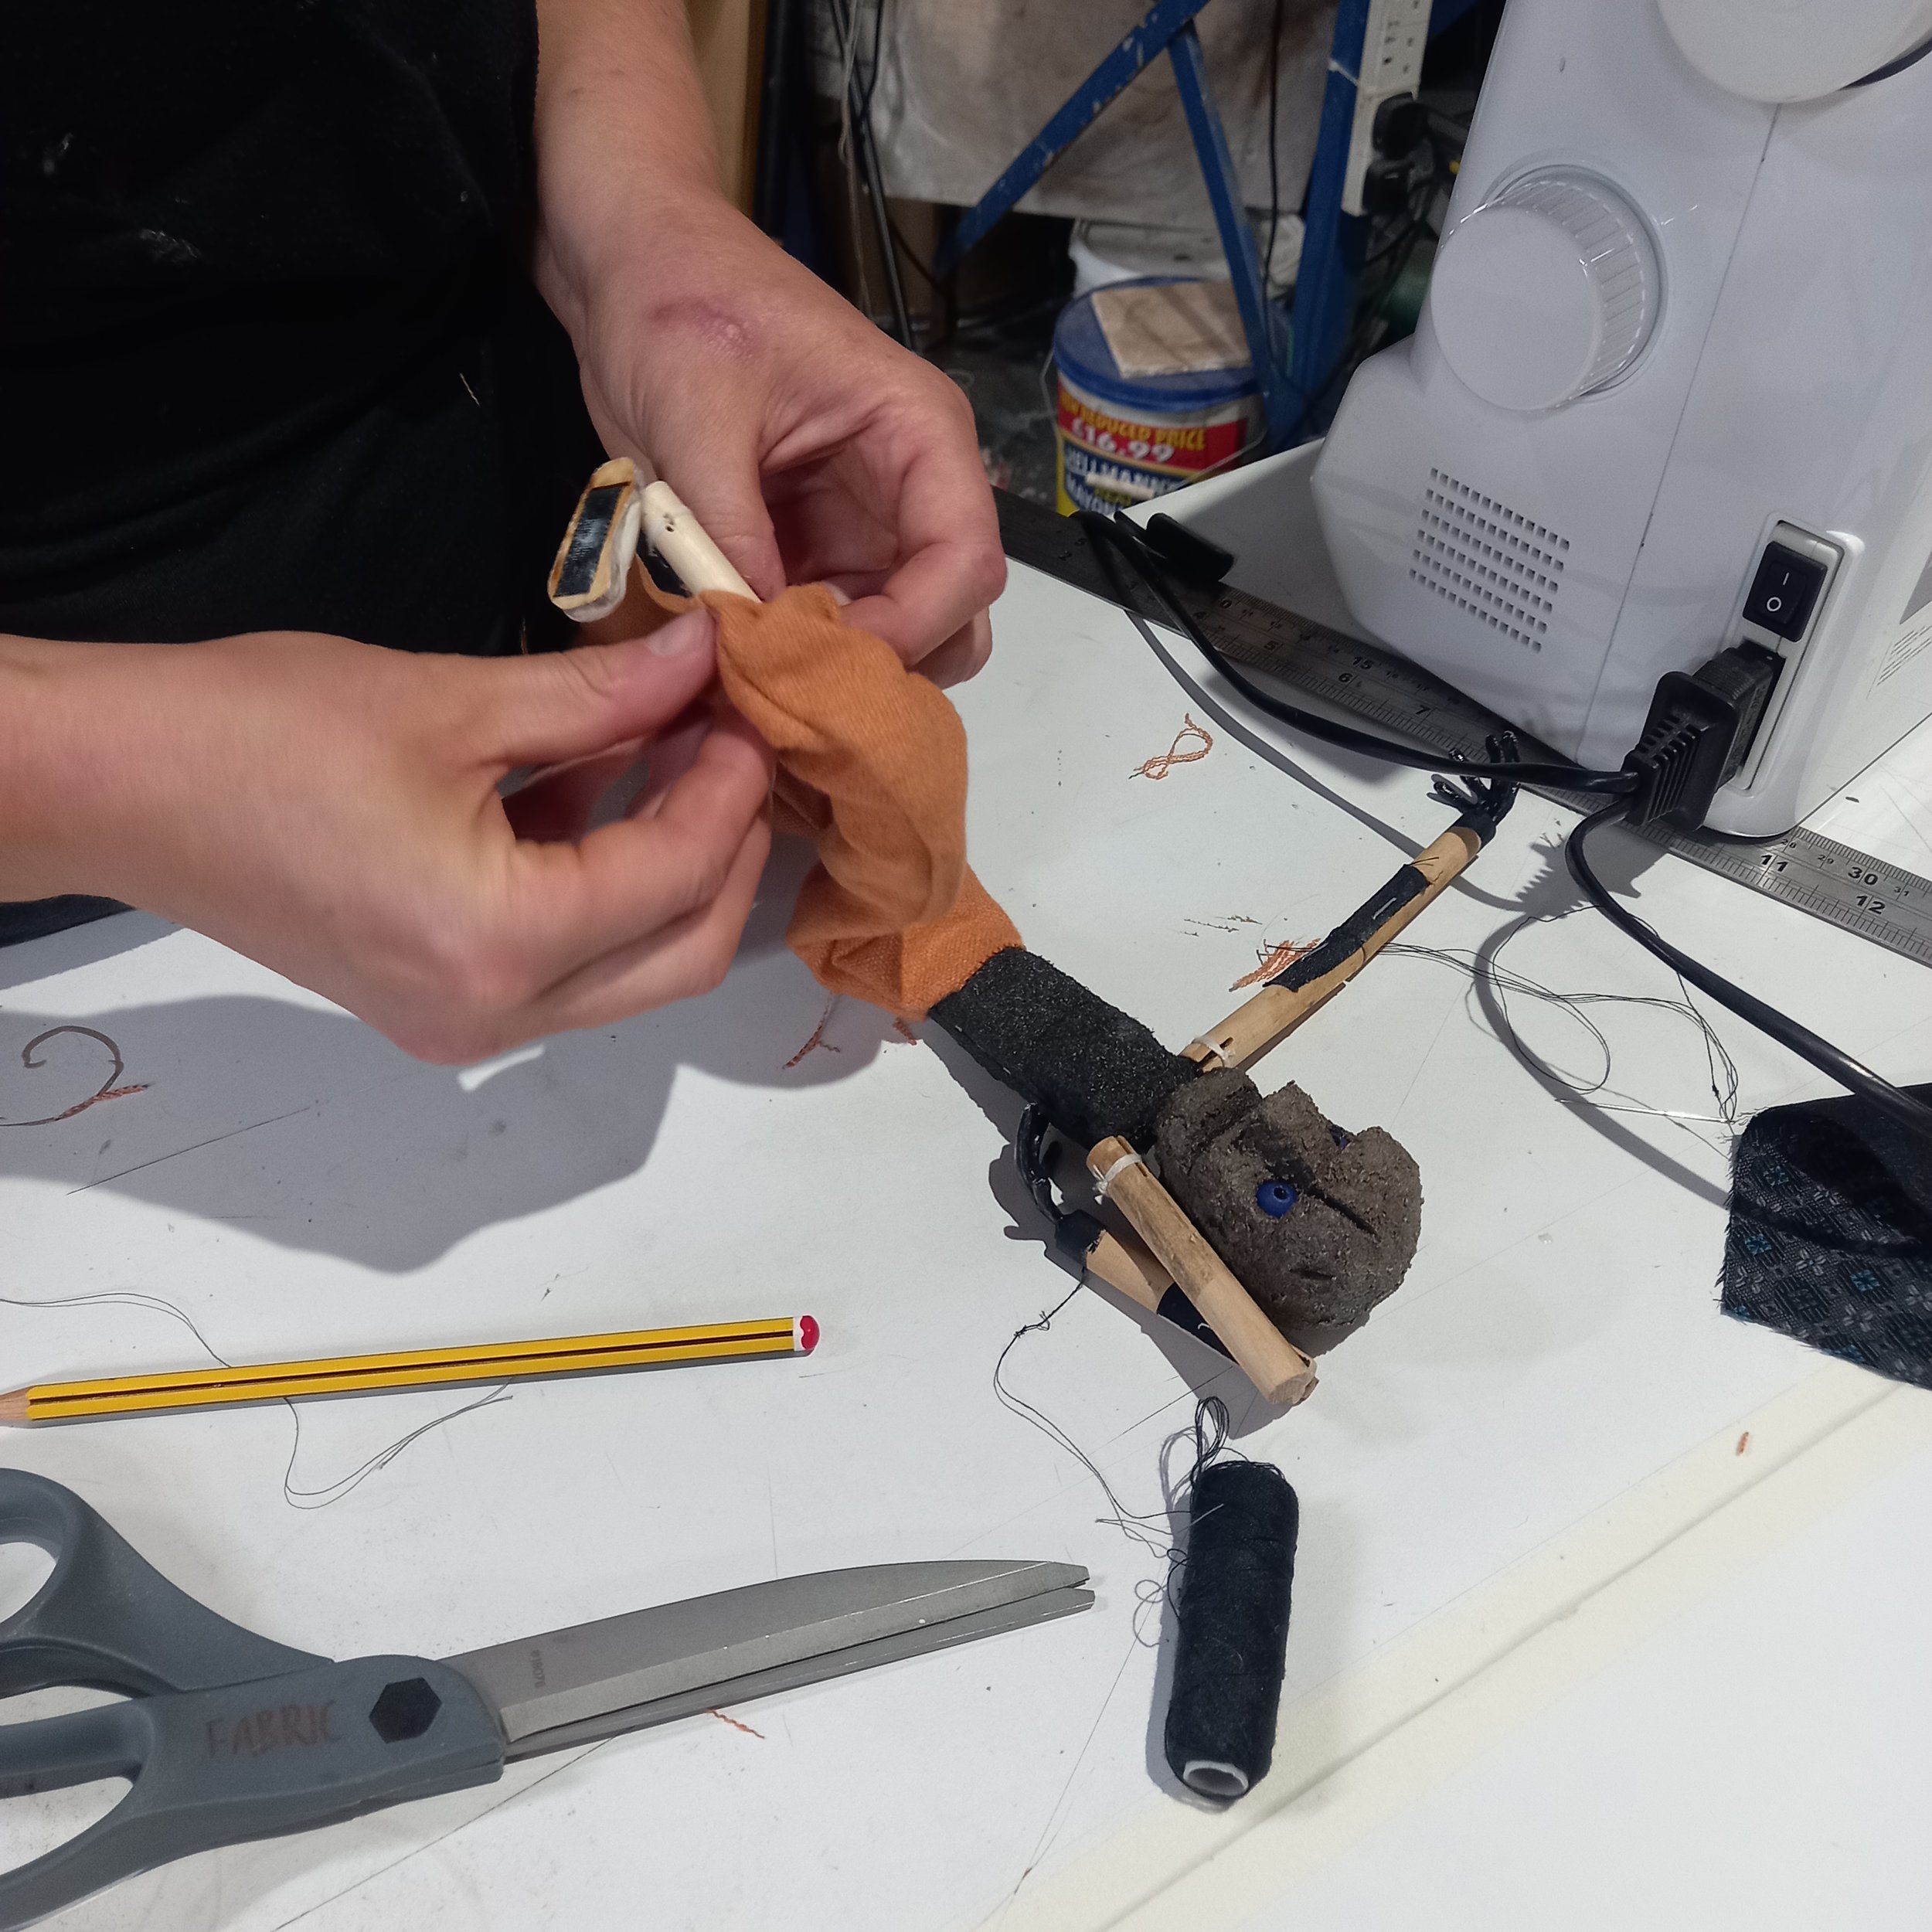
In contrast, fabricating hands, especially the wire armatures that formed the basis for them before adding Milliput and sanding them back, came much easier. I enjoyed the process of looping the wire, forming it into the shapes that would become the digits and palm, before tightly twisting those loops and snipping them back to make the fingers. I enjoyed it so much, I may have got carried away with using wire… (see Fabrication: Cat Puppet).
The puppet’s feet were also sculpted out of Milliput, but this time over a thin layer of wood that was cut into the shape of their boot soles using a laser cutter. These boots were attached to the ankles using webbing and contained magnets - to give them some weight, and - if needed - a means to anchor the puppet down by inserting a metal surface under where they might stand. This allowed a single puppeteer to keep tension in the puppet through the feet and into the head, while using one rod on the head and another rod to control an arm.
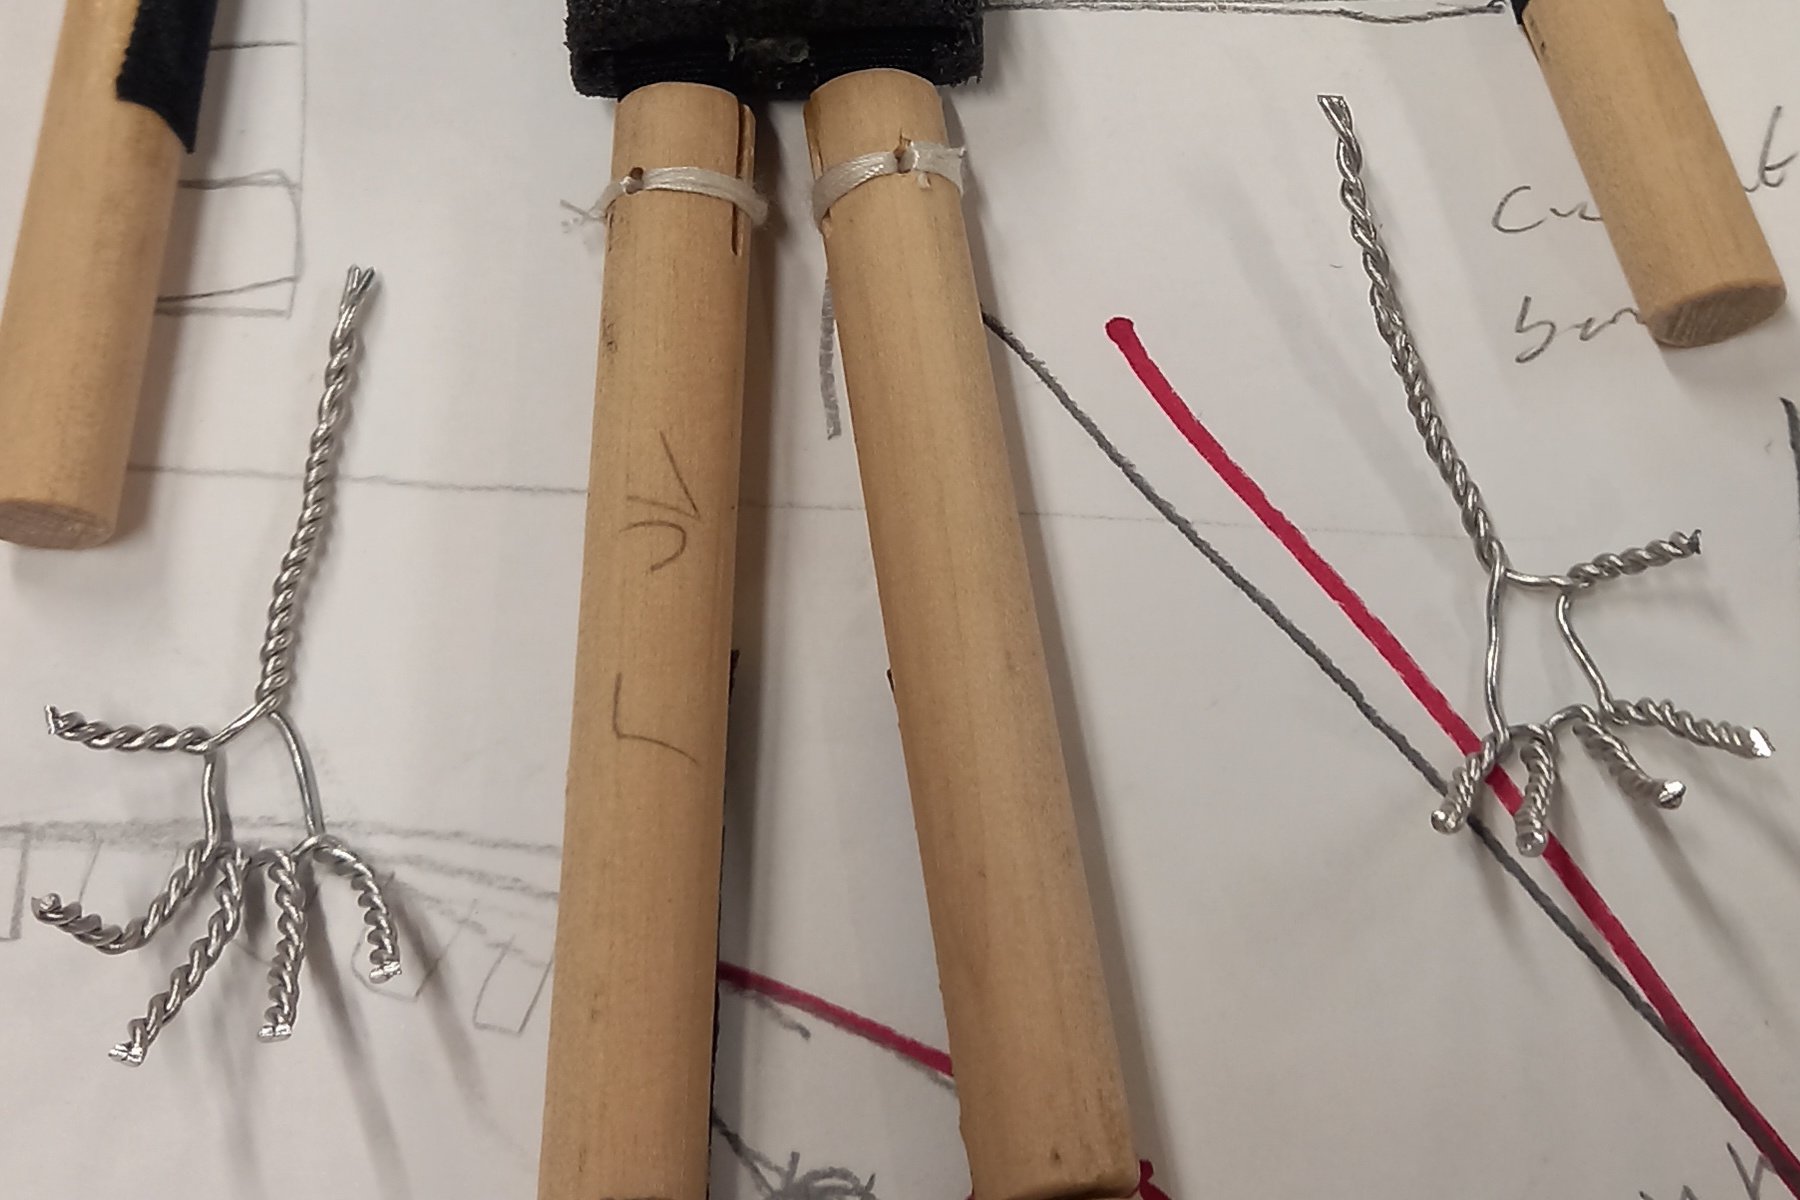
On the subject of rods, we settled on using K&S square brass tubes as sockets on the puppet, which a metal rod with another K&S tube at the end of could be inserted. This enabled us to remove rods when not needed or swap rods to other points of articulation, while the metal rod itself could be bent to the shape required. In the end, we added K&S sockets to the back of the head, the back of the torso, and the elbows and wrists. Metal rods could be more easily attached to the feet using the magnets placed there.
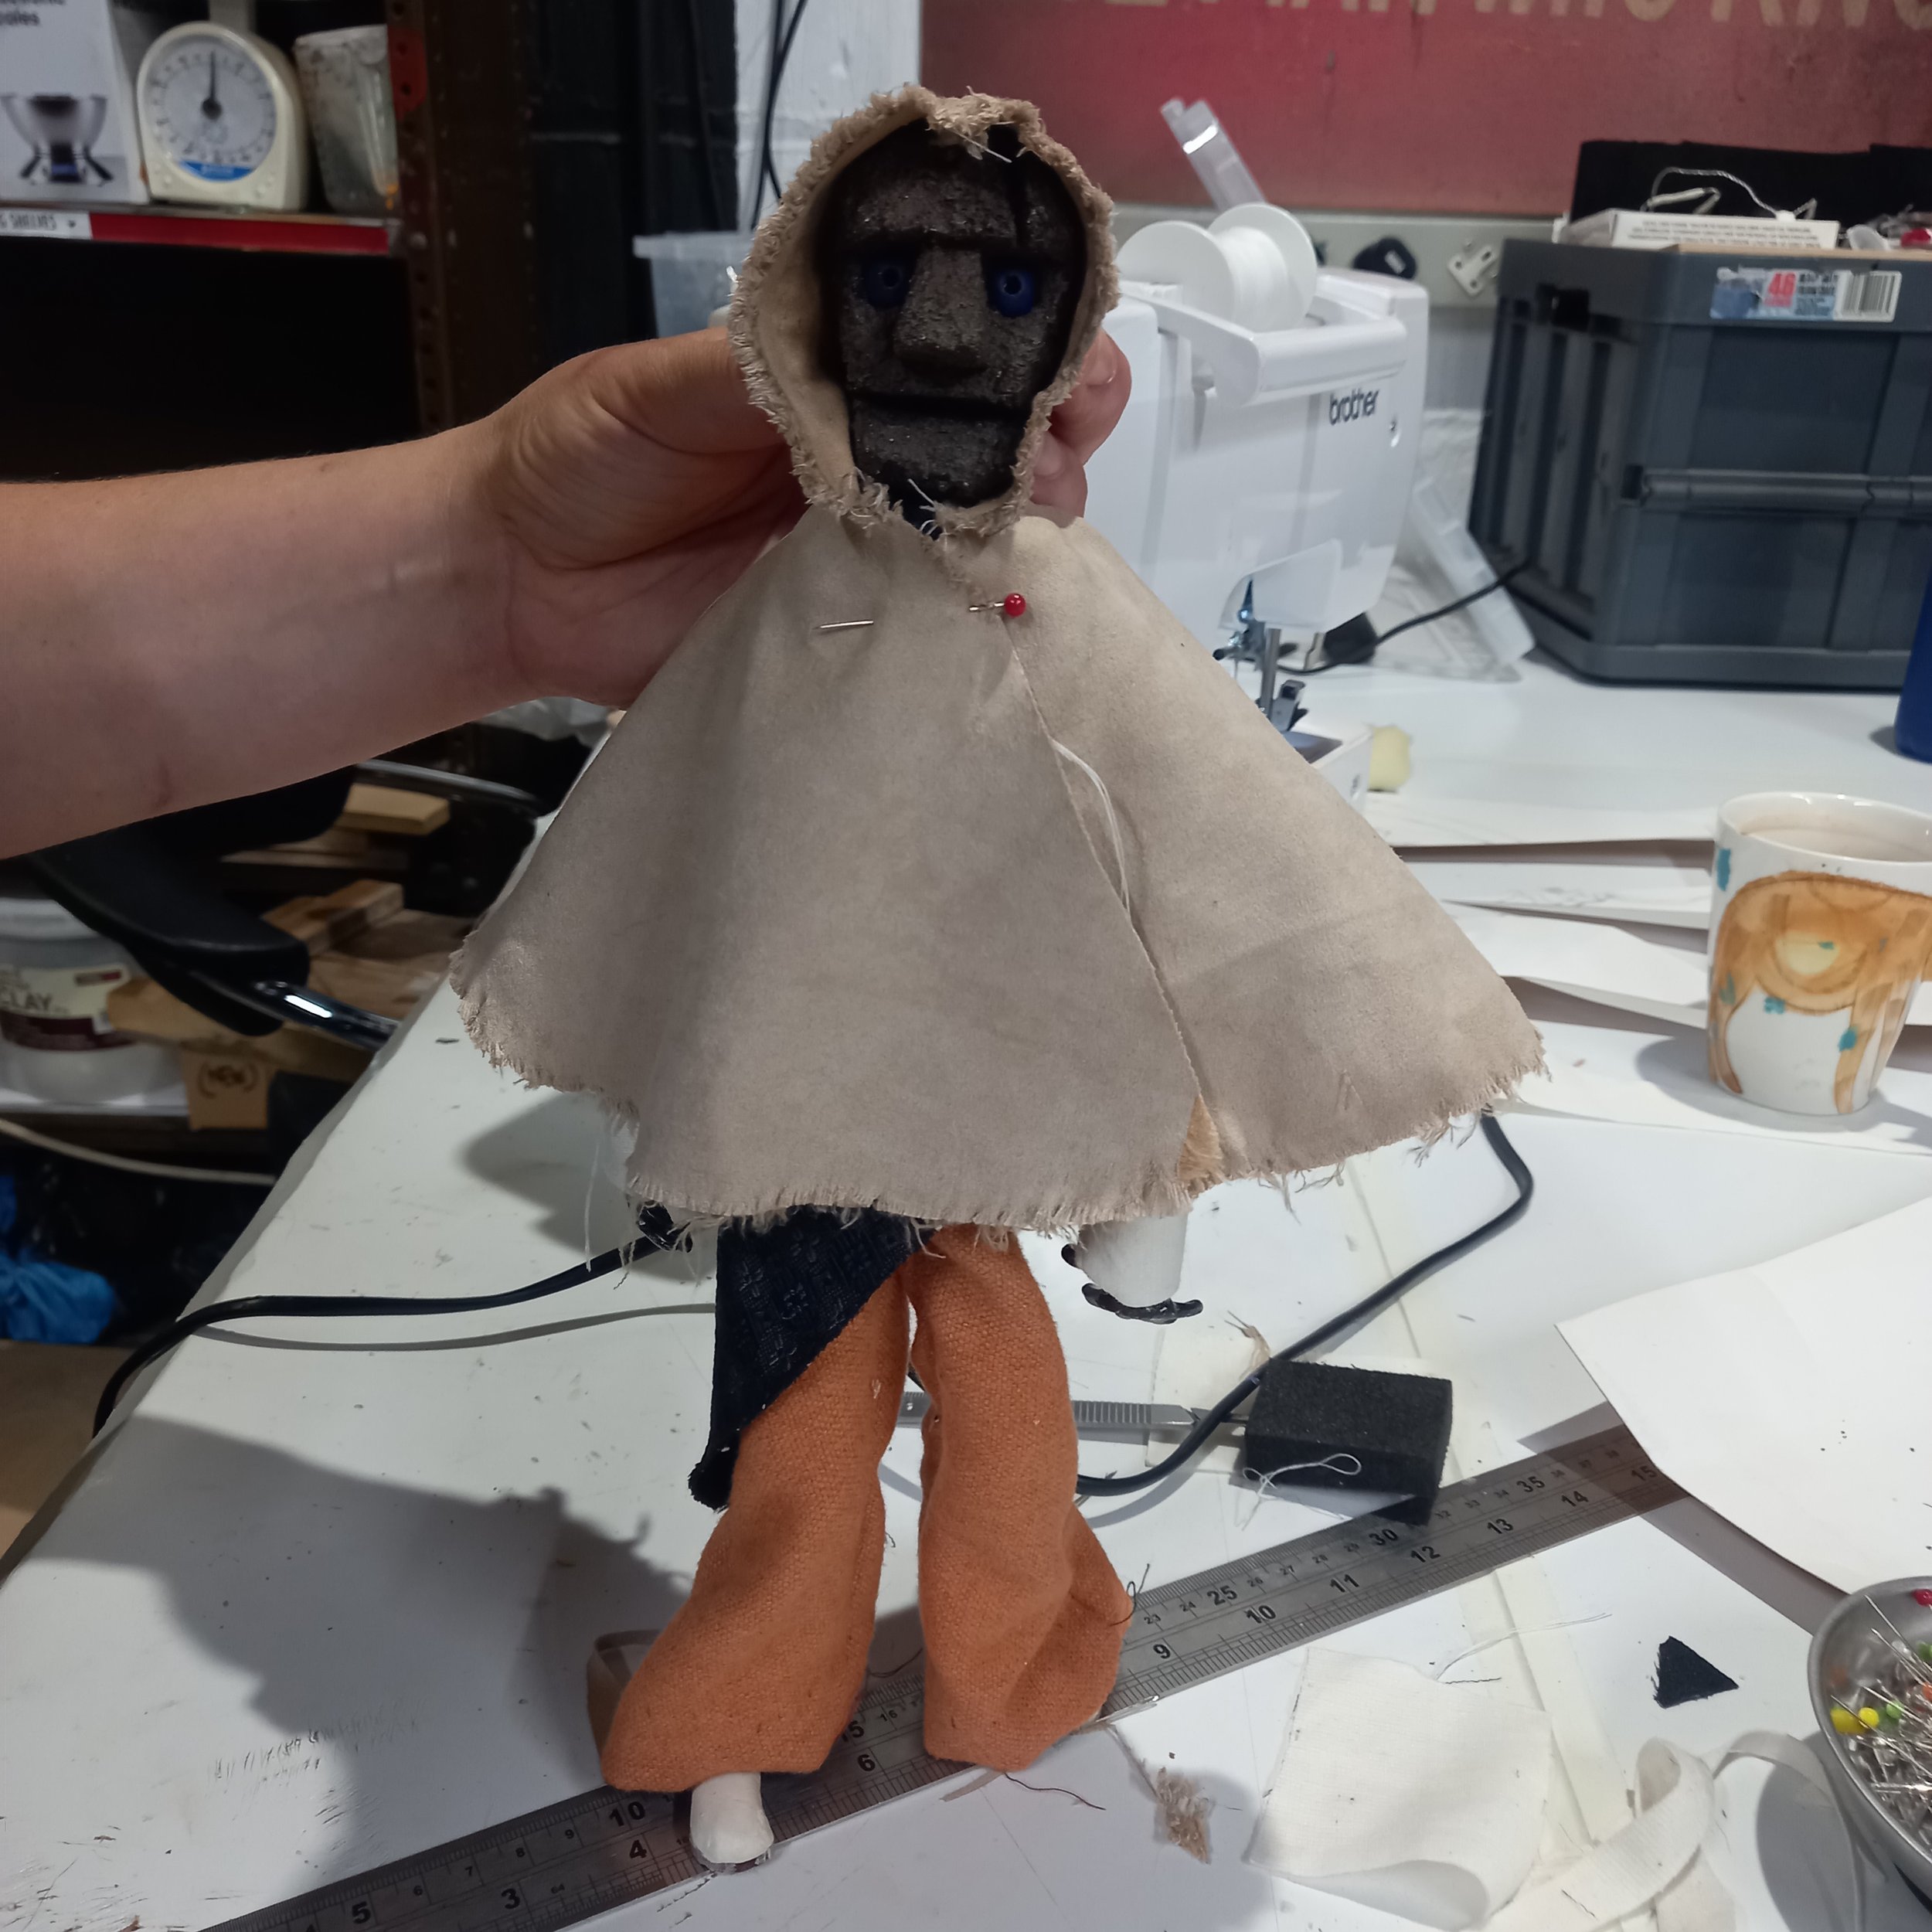

Cat tutored and assisted me with the clothing, which in many respects is the same as making any garment - but at the scale of the puppet in question! Once we were happy with the design, our choice of fabrics, and colour scheme, our first step was making patterns to cut out the clothes. These were then machine or hand sewn, before the clothes were fitted to and attached to the puppet.
One important consideration, is the scale of the puppet and the nature of the fabrics and materials used. At smaller scales, some fabrics will not look right, will not hang or move like they would in real life, and this danger of dissonance needs to be considered and accounted for.
With the clothes done, there were just a couple more jobs to complete - touching up the paintwork of the face, hands, and feet, and distressing and dirtying up the clothes to make them feel lived in - before our humanoid puppet was ready.